Home Blog Page 18

Can You Use a Garlic Press for Ginger? Explained 2023

Welcome to our blog post, “Can You Use a Garlic Press for Ginger? Explained 2023.” If you’re a kitchen enthusiast or someone who loves experimenting with flavors, you’ve probably wondered whether a garlic press can also be used for ginger. Both garlic and ginger add delightful depth and aroma to our dishes, but they have distinct textures and properties. 

In this article, we will delve into the world of culinary tools and explore whether a garlic press can handle the task of mincing ginger effectively. Join us as we uncover the possibilities and discover if this time-saving hack is a match made in culinary heaven. Let’s get started!

What is a Garlic Press

What is a Garlic Press

Before we delve into whether a garlic press can handle ginger, let’s first understand what it is and how it works. A garlic press is a small kitchen tool designed to crush garlic cloves quickly and efficiently. It typically consists of two handles connected to a chamber with small holes at the bottom. To use a garlic press, place a peeled garlic clove inside the chamber and squeeze the handles together. 

As you exert pressure, the garlic clove is forced through the tiny holes, resulting in finely minced garlic ready to be added to your favorite recipes. This time-saving gadget has become a staple in many kitchens, allowing cooks to enjoy garlic flavor without the hassle of traditional mincing. But can it work its magic on ginger too? Let’s find out!

Can You Use a Garlic Press for Ginger

Now comes the burning question: can a garlic press also handle the task of mincing ginger? While the primary purpose of a garlic press is to crush garlic cloves, some adventurous cooks have attempted to use it for ginger too. The idea is quite tempting – a garlic press can effortlessly transform garlic into a fine paste, so why not try it with ginger to save time and effort in the kitchen?

However, before you rush to test this culinary hack, some crucial factors must be considered. Garlic and ginger may share a few similarities, such as being aromatic and flavorful, but they differ significantly in texture and fibrous nature. Garlic cloves are relatively small and soft, making them easy to crush, while the ginger root is much more brutal and fibrous, requiring a more robust approach.

You may encounter some challenges as you insert ginger into the garlic press and apply pressure. The ginger’s fibrous nature can clog the small holes in the press, hindering the smooth extraction of ginger paste. Furthermore, ginger tends to have a stringy texture that can get stuck in the press, making it challenging to achieve the desired consistency.

Even so, some kitchen enthusiasts have reported limited success using a garlic press for ginger. If you try it, using fresh and young ginger is essential, as it tends to be less fibrous and more suitable for this experiment.

However, traditional methods, such as using a sharp knife or grater, might be your best bet for a more efficient and reliable way to mince ginger. These methods allow you to control the texture and ensure you get the most out of this flavorful root. So, while a garlic press is undoubtedly an excellent tool for garlic when it comes to ginger, it might be best to stick to the tried and tested techniques.

Other Ways to Process Ginger

Other Ways to Process Ginger

While a garlic press might not be the best option for mincing ginger, fear not, as several tried-and-true methods exist to process this versatile root. Each technique offers a different texture and level of intensity, allowing you to choose the perfect way to incorporate ginger into your culinary creations. Let’s explore some of the most common methods:

Grating: Using a grater is an efficient way to process ginger, especially when you want a fine texture. Peel the ginger root and rub it against a fine grater. The result is a delicate ginger paste that blends seamlessly into soups, sauces, and marinades.

Slicing: Slicing is the way to go if you prefer a more visible and subtle presence of ginger in your dishes. Peel the ginger and cut it into thin slices. These slices can add a mild, slightly spicy kick to stir-fries and beverages.

Mincing: Mincing ginger with a knife is a classic technique that allows you to control the size and texture of the ginger pieces. After peeling the ginger, finely chop it into small, uniform bits, releasing its full flavor potential.

Crushing with a Knife: If you don’t have a garlic press but still want to release ginger’s essence, you can use the back of a knife to crush the ginger gently. Start by peeling the ginger, then lay the flat side of the knife on top and press down with your palm. This method helps to release the ginger’s juices while keeping the texture relatively coarse.

Each method offers a unique way to process ginger, and the choice depends on the dish you’re preparing and your preferences. Whether adding a zesty touch to your stir-fries or infusing your tea with warmth, ginger brings its magic to the table in various delightful ways. So, pick your preferred ginger-processing technique, and let your culinary creativity shine!

Using a Mortar and Pestle for Ginger

For those who love the artistry of traditional cooking techniques, a mortar, and pestle can be an excellent tool for processing ginger. This ancient kitchen device allows you to crush and grind ginger, unleashing its full aroma and flavor while giving you more control over the texture.

To use a mortar and pestle effectively, peel the ginger and cut it into smaller pieces for easier handling. Place the ginger bits into the mortar, taking care not to overload it, as leaving some space will help with the grinding process. With the pestle in hand, press down firmly on the ginger pieces while simultaneously using a twisting motion. This rhythmic grinding action releases the ginger’s essential oils, intensifying its taste.

The mortar and pestle method allows you to adjust the ginger’s texture according to your preference. For a coarse texture, lightly grind the ginger until you achieve the desired consistency for a smooth paste.

Apart from its culinary benefits, using a mortar and pestle can be a meditative experience, connecting you to cooking traditions that have been cherished for generations. The sound and motion of grinding ginger by hand evoke a sense of craftsmanship and mindfulness in the kitchen.

Furthermore, mortar and pestle are not limited to ginger alone. You can use this versatile tool to crush various spices, herbs, and other aromatic ingredients, creating a symphony of flavors in your dishes.

So, if you find joy in savoring the food preparation process and want to elevate the taste of your ginger-infused delights, consider reaching for a mortar and pestle. Embrace the ancient art of grinding and let the vibrant essence of ginger fill your kitchen with its enchanting aroma.

Choosing the Right Garlic Press for Ginger

While a garlic press might not be the ideal tool for ginger, advancements in kitchen gadgets have created versatile presses that can handle various tasks. If you’re determined to explore using a garlic press for ginger or want a multi-functional tool, here are some essential factors to consider when choosing the right garlic press for this purpose:

Sturdy Construction: Look for a garlic press made from durable materials, such as stainless steel, as it can withstand the toughness of ginger. A well-built press will ensure longevity and reliable performance.

More comprehensive Chamber: Opt for a garlic press with a broader chamber to accommodate larger ginger pieces. This design feature prevents clogging and allows more efficient ginger paste extraction.

Ergonomic Design: A garlic press with an ergonomic design and comfortable grip will make the task of processing ginger easier and less taxing on your hands.

Easy to Clean: Choose a garlic press that is easy to clean, preferably dishwasher-safe, to save time and effort during the cleanup process.

User Reviews: Check customer reviews and feedback to gauge the effectiveness of the garlic press for handling ginger. Real experiences from other users can provide valuable insights into its performance.

Brand Reputation: Stick to well-known brands with a good reputation for producing high-quality kitchen tools. A reputable brand is more likely to offer functional and reliable products.

Versatility: Some modern garlic presses have additional features or interchangeable components that allow them to handle various tasks beyond garlic, making them suitable for processing ginger.

Remember, while a garlic press designed for ginger may offer some advantages, it might only partially replace traditional methods like grating or slicing. The best results often come from using the appropriate tool for each task. So, consider the intended use of the garlic press and explore other techniques for processing ginger to create culinary masterpieces that burst with flavor and aroma.

Other Uses for a Garlic Press

While a garlic press is primarily designed for crushing garlic, its versatility extends beyond this aromatic bulb. Here are some creative ways you can utilize a garlic press in your kitchen:

Crushing Other Aromatics: In addition to garlic, a garlic press can be handy for crushing other aromatic ingredients. Try using it to crush small quantities of fresh herbs like rosemary, thyme, or mint to release their fragrant oils directly into your recipes.

Extracting Juice: If you need a small amount of juice from ingredients like ginger, shallots, or citrus fruits, a garlic press can come to the rescue. Place the ingredient in the press and squeeze, allowing the juice to flow effortlessly.

Making Baby Food: A garlic press can be a valuable tool for parents looking to prepare homemade baby food. Use it to mash soft fruits and cooked vegetables into a smooth and easily digestible consistency.

Preparing Herbal Infusions: A garlic press can help extract the essence of herbs and spices when making herbal infusions or teas. Crush ingredients like ginger, cinnamon sticks, or cardamom pods intensify their flavors as they steep in hot water.

Creating Flavorful Butter: Elevate your butter by infusing it with aromatic ingredients. Crush garlic cloves, herbs, or even citrus zest using a garlic press, and mix them into softened butter. Spread this flavorful compound butter on bread or enhance the taste of grilled meats and vegetables.

Crafting Beauty Products: A garlic press can be repurposed for crafting homemade beauty products. Use it to extract fresh juices from ingredients like cucumber or aloe vera for natural skincare applications.

These alternative uses demonstrate the versatility of a garlic press, allowing you to explore new culinary horizons and get creative with your ingredients. Embrace the possibilities and let your garlic press become a multi-functional tool in your kitchen, expanding your culinary repertoire and adding a dash of convenience to your cooking endeavors.

Why Use a Garlic Press for Ginger

Why Use a Garlic Press for Ginger

If you’re considering using a garlic press for ginger, there are several reasons why it might be worth trying. While a garlic press may not be the most traditional tool for processing ginger, it offers some distinct advantages that could enhance your cooking experience. Here are the key benefits:

Time-saving benefits: Using a garlic press for ginger can be a real time-saver, especially when you need finely minced ginger urgently. Unlike traditional methods that require meticulous chopping or grating, a garlic press allows you to extract ginger paste quickly with just a simple squeeze of the handles.

Consistency of texture: One of the challenges of mincing ginger with a knife or grater is achieving a consistent texture. On the other hand, a garlic press can provide a uniform texture to the ginger paste, ensuring an even distribution of flavor in your dishes.

Ease of use: Operating a garlic press is relatively effortless, requiring minimal physical effort. This ease of use makes it a convenient option for home cooks who want to add ginger to their recipes without the fuss of traditional methods.

While using a garlic press for ginger has benefits, it’s essential to remember that it might not be as effective as specialized tools like graters or knives when handling ginger’s fibrous nature. Additionally, the size and design of the garlic press chamber may limit the quantity of ginger you can process at once.

The garlic press can be a practical choice for small cooking tasks requiring a quick ginger fix. However, you may still want to rely on traditional methods for larger quantities or more precise texture control. 

Ultimately, the decision boils down to your preferences, the recipes you’re preparing, and the tools you have. Embrace the versatility of your garlic press, and experiment with ginger and other aromatic ingredients to create delightful flavors in your kitchen.

Conclusion

While a garlic press can be a convenient and time-saving option for mincing ginger, it may only partially replace traditional methods like grating or slicing, especially when dealing with fibrous ginger roots. The garlic press can deliver a consistent texture and offers ease of use, making it suitable for small ginger processing tasks. However, other kitchen tools might be more appropriate for larger quantities or precise control over the ginger’s texture. 

Embrace the versatility of your garlic press, explore various culinary experiments, and savor the delightful flavors that ginger brings to your dishes. Whether you’re using a garlic press, grater, or knife, the magic of ginger continues to enhance the taste of your favorite recipes, adding warmth and depth to your culinary creations. Happy cooking!

Frequently Asked Questions

Can I use a garlic press for other herbs and spices? 

Yes, a garlic press can be used for crushing and releasing the flavors of various aromatic herbs and spices. Ingredients like rosemary, thyme, mint, and even small portions of ginger can be processed effectively using a garlic press.

Can I use a ginger press for garlic? 

While a ginger press might handle garlic, it’s essential to remember that ginger presses are specifically designed for the fibrous nature of ginger. For optimal results, it’s best to use a garlic press for garlic and explore other methods for processing ginger.

How do I clean my garlic press? 

Cleaning a garlic press is usually straightforward. Start by rinsing off any excess garlic residue immediately after use. Use a small brush, like a toothbrush, to remove any remaining bits from the small holes. If the press is dishwasher-safe, you can place it for a more thorough cleaning. Otherwise, wash the press with warm soapy water and a brush, then dry it thoroughly.

How do you crush garlic and ginger? 

To crush garlic, place an unpeeled clove on a cutting board and gently press it with the flat side of a knife or the heel of your palm. The skin will loosen, and you can easily peel the clove. For ginger, use the back of a spoon or a knife to scrape off the skin, then cut it into smaller pieces and use a grater, knife, mortar, and pestle to crush or mince as desired.

What else can you use a garlic press for? 

Apart from garlic and various herbs, a garlic press can extract juice from ingredients like ginger, shallots, or citrus fruits. It can also make baby food by mashing soft fruits and cooked vegetables. A garlic press can also prepare herbal infusions and craft-flavored butter and create beauty products by extracting fresh juices from ingredients like cucumber or aloe vera. Get creative in the kitchen and explore the many possibilities a garlic press offers!

Can You Store Iced Tea in a Colander? (Answered 2023)

Welcome to our blog post, where we’ll explore an interesting question: Can you store iced tea in a colander? If you’ve ever found yourself in a situation where you needed to strain your iced tea but couldn’t find a suitable container, this article is for you. 

We’ll explore the possibilities and limitations of using a colander to store your refreshing beverage. So, let’s dive in and discover the answer to this intriguing question.

What is a Colander

A colander is a kitchen utensil for straining liquids and separating solids from liquids. It typically consists of a bowl-shaped container with small perforations or holes on the sides and bottom. Colanders are commonly made of metal, plastic, or silicone and come in various sizes. 

They allow liquid to drain out while retaining the solids within the container. Colanders are commonly used for rinsing fruits and vegetables, draining pasta, and separating liquid from cooked food. They are an essential tool in any kitchen, offering convenience and efficiency in food preparation.

Characteristics of Iced Tea

Characteristics of Iced Tea

Iced tea is a popular and refreshing beverage, especially during the hot summer. It is made by steeping tea leaves in hot water and then chilling the mixture before serving it over ice. Here are some critical characteristics of iced tea:

Refreshing: Iced tea is known for its thirst-quenching properties. The combination of cold temperatures and tea flavors creates a refreshing sensation, making it a popular choice for staying cool and hydrated.

Variety of flavors: Iced tea comes in a wide range of flavors, from traditional black tea to fruity and herbal blends. This variety allows for customization based on personal preferences and offers a pleasant taste experience.

Versatility: Iced tea can be enjoyed plain or with added ingredients such as lemon slices, mint leaves, or sweeteners like sugar or honey. This versatility allows individuals to tailor the taste of their iced tea according to their liking.

Health benefits: Iced tea can offer various health benefits depending on the type of tea used. Green tea, for example, is known for its antioxidant properties, while herbal teas can provide relaxation and digestive benefits.

Hydration: Iced tea contributes to daily hydration needs like any other beverage. It provides a flavorful alternative to plain water and encourages individuals to drink adequate fluids throughout the day.

Storing Iced Tea

Proper storage is crucial to maintain the quality and freshness of iced tea. While various containers are available for storing beverages, it’s essential to consider the specific requirements of iced tea. Here are some factors to keep in mind when storing your iced tea:

Airtight container: To prevent the absorption of odors and maintain the flavor of your iced tea, it’s best to store it in an airtight container. This helps preserve the taste and aroma, ensuring your iced tea remains enjoyable.

Glass or BPA-free plastic: Choosing a suitable material for your storage container is essential. Glass containers are popular as they do not retain odors or leach chemicals into the tea. BPA-free plastic containers are also suitable options, ensuring the safety of the stored beverage.

Refrigeration: Iced tea is best stored in the refrigerator to maintain freshness and prevent bacterial growth. The refrigerator’s cool temperature helps inhibit the growth of microorganisms and extends the shelf life of the iced tea.

Avoid direct sunlight: Exposure to sunlight can degrade the quality of the tea and lead to flavor changes. It’s essential to store your iced tea in a cool, dark place or keep it away from direct sunlight to preserve its taste and color.

Limited storage duration: While iced tea can be stored for a certain period, it’s best to consume it within a few days to ensure optimal flavor and quality. Over time, the taste of the tea may become stale, or the tea may lose its freshness.

Following these guidelines ensures that your iced tea remains delicious and enjoyable for as long as possible.

Understanding The Storage of Iced Tea

Understanding The Storage of Iced Tea

When storing iced tea, it’s essential to consider the factors affecting its quality and taste. By understanding the storage process, you can ensure that your iced tea remains fresh and delicious. Here are some key points to help you better understand the storage of iced tea:

Temperature control: 

Temperature plays a crucial role in preserving the quality of iced tea. As mentioned earlier, refrigeration is the best way to store iced tea. The refrigerator’s cool temperature helps slow the oxidation process, keeping the tea flavors intact. Avoid storing iced tea at room temperature for extended periods, as it can lead to bacterial growth and spoilage.

Avoid prolonged storage: 

While refrigeration helps prolong the shelf life of iced tea, consuming it within a few days is still advisable for the best taste. Over time, even when properly stored, iced tea can lose its freshness, and the flavors may deteriorate. Preparing and enjoying iced tea in smaller batches is always recommended to ensure optimal taste.

Proper sealing: 

Ensuring that your storage container is tightly sealed is essential to prevent air exposure and maintain the flavor of iced tea. Use containers with secure lids or caps that create an airtight seal. This helps preserve the tea’s aroma and taste while preventing contamination.

Avoid cross-contamination: 

When storing iced tea, keeping it separate from other strong-smelling or spicy foods is essential. Iced tea can easily absorb odors from its surroundings, leading to an undesirable taste. Store it away from strong-smelling foods in the refrigerator to maintain its original flavor.

Consider portioning: 

If you anticipate being unable to consume a large batch of iced tea within a few days, consider portioning it into smaller containers before refrigerating. This way, you can easily access and enjoy a fresh serving of iced tea without exposing the entire batch to air and potential flavor degradation.

Understanding these aspects of iced tea storage ensures that your favorite beverage remains flavorful and refreshing.

How to Use a Colander

Using a colander is a simple and effective way to strain liquids and separate solids from them. A colander can be a valuable kitchen tool if you’re preparing iced tea or any dish that requires draining. Here’s a step-by-step guide on how to use a colander:

  • Select the Right Colander: Before you begin, choose a colander that suits your needs. Ensure it is the appropriate size for the amount of liquid or food you wish to strain. Look for a colander with miniature perforations to prevent small items from slipping.
  • Position the Colander: Place the colander inside a sink or a giant bowl. The colander should rest securely with its bottom elevated, allowing the liquid to drain freely.
  • Add the Liquid or Food: Carefully pour the liquid or food you wish to strain into the colander. Be cautious to avoid overflowing the colander or strain too much at once, which may lead to spillage or uneven draining.
  • Drain the Liquid: Let gravity work and allow the liquid to pass through the small holes in the colander’s sides and bottom. You can gently shake the colander to speed up the draining process.
  • Collect the Solids: As the liquid drains away, the solids (such as pasta, fruits, or vegetables) will remain in the colander. Once the draining process is complete, transfer the solids to a separate dish or a serving platter.
  • Rinse and Clean: Rinse the colander thoroughly with water to remove any remaining food particles. Clean the colander with mild soap and water, and let it dry before storing it.

Using a colander is a straightforward and efficient way to strain liquids and make your cooking and food preparation tasks more manageable. With this knowledge, you can confidently use a colander to strain and enjoy your iced tea or any other culinary creations.

Can You Store Iced Tea in a Colander

There may be more suitable options than storing iced tea in a colander. While colanders are excellent for draining liquids and separating solids, they are not designed for long-term storage. Colanders have larger holes and are intended for immediate use during food preparation. Suppose you store iced tea in a colander. In that case, the liquid will leak through the holes and not be appropriately contained, leading to a messy situation in your refrigerator or kitchen counter.

An airtight container or a pitcher with a lid is best for storing iced tea. These containers will keep the iced tea fresh and prevent any potential spills or leaks. Glass or BPA-free plastic containers are ideal choices as they won’t affect the taste of the tea. Remember to refrigerate the container to maintain the desired cool temperature. If you have leftover iced tea, consuming it within a few days is advisable for the best taste experience.

While a colander is an excellent tool for draining your iced tea during brewing, it is not the appropriate choice for long-term storage. Embrace the versatility of the colander in your kitchen, but when preserving the freshness of your delightful iced tea, opt for a proper container to keep your beverage at its best.

How to Clean a Colander

How to Clean a Colander

Cleaning a colander is a simple task ensuring it remains in good condition and free from lingering food particles. Follow these easy steps to clean your colander effectively:

Rinse Immediately After Use: When you finish using the colander, rinse it under warm water to remove any visible debris or food particles. This prevents the residue from drying and sticking to the colander, making cleaning more manageable.

Use a Soft Brush or Sponge: For a thorough cleaning, use a soft brush or sponge to scrub the colander’s surface, inside and out, gently. Pay special attention to the small perforations, ensuring all remnants are removed.

Soak in Warm, Soapy Water: Fill your sink or a basin with warm water and add a few drops of mild dish soap. Submerge the colander in the soapy water and let it soak for a few minutes. This helps to loosen any stubborn residues and makes cleaning more effective.

Scrub Again, if Needed: After soaking, take the soft brush or sponge and scrub the colander again, paying attention to any areas that might need extra cleaning.

Rinse Thoroughly: Rinse the colander under running water to remove any soap residue and ensure it’s spotless.

Dry Completely: Shake off any excess water from the colander and place it on a dish rack or a clean towel to air dry completely. Make sure no moisture is trapped inside the small holes.

Check for Lingering Odors: If your colander has absorbed any strong smells, like from onions or garlic, you can eliminate the odors by washing it with a mixture of baking soda and water. Rinse it thoroughly afterward.

Store Properly: Once the colander is dry, store it in a clean and dry location, ready for your next culinary adventure.

Cleaning your colander after each use not only ensures a hygienic kitchen but also prolongs the life of this essential kitchen tool. Proper cleaning and care will serve your colander well for various culinary tasks.

Conclusion

While a colander is a valuable tool for straining liquids and separating solids, it is unsuitable for storing iced tea. The larger holes in a colander would allow the liquid to leak, leading to a messy situation and potential waste. Instead, opt for an airtight container or pitcher with a lid to store your iced tea and keep it fresh. Remember to refrigerate the container and consume the iced tea within a few days for the best taste experience. 

When cleaning the colander, rinse it immediately, scrub it with a soft brush or sponge, and soak it in warm, soapy water. Rinse thoroughly and ensure it’s scorched before storing it. Following these guidelines, you can make the most of your colander in the kitchen while enjoying delicious iced tea without storage or cleaning issues.

FAQs

How do you keep iced tea fresh? 

Store iced tea in an airtight container or pitcher with a lid to keep iced tea fresh. Refrigeration is essential, as it slows the oxidation process and prevents bacterial growth. Be sure to consume the iced tea for the best taste and quality within a few days.

Does iced tea go bad if not refrigerated? 

If left at room temperature for an extended period, iced tea can go wrong. Bacteria can multiply rapidly in warm conditions, leading to spoilage and an undesirable taste. Always refrigerate iced tea to maintain its freshness.

How long is homemade iced tea good for in the fridge? 

When stored correctly in the refrigerator, homemade iced tea is generally good for about 3 to 5 days. Beyond this timeframe, the taste and quality of the tea may need to improve. It’s best to consume it within the recommended time frame.

How often should you clean your colander? 

The frequency of cleaning your colander depends on how often you use it. Ideally, clean it after each use by rinsing it under warm water and using a soft brush or sponge to remove any residue. You can soak it in warm, soapy water and scrub it again for thorough cleaning.

How do you know if iced tea has gone wrong? 

If iced tea has gone wrong, it may have an unusual or sour smell. Visual changes, such as cloudiness or mold growth, are signs of spoilage. If you notice any of these indicators, it’s best to discard the tea and avoid consuming it.

Dutch Oven for Deep Frying: The Ultimate Guide 2023

0

Welcome to the ultimate guide to using a Dutch oven for deep frying! You’ve come to the right place if you’re a food enthusiast or a cooking fan. In this comprehensive guide, we will explore the wonders of Dutch ovens and how they can be a game-changer for deep frying. 

Whether you’re a seasoned chef or a beginner in the kitchen, we will take you through everything you need to know to achieve crispy, delicious results every time. From choosing the right Dutch oven to mastering the art of temperature control, get ready to elevate your deep-frying skills to new heights in 2023. Let’s dive in!

Why Use a Dutch Oven for Deep Frying

Deep frying is an art that requires precision and the right equipment to achieve perfect results. When choosing the ideal tool for deep frying, a Dutch oven stands out as a top contender. But why should you consider using a Dutch oven for deep frying? There are several compelling reasons.

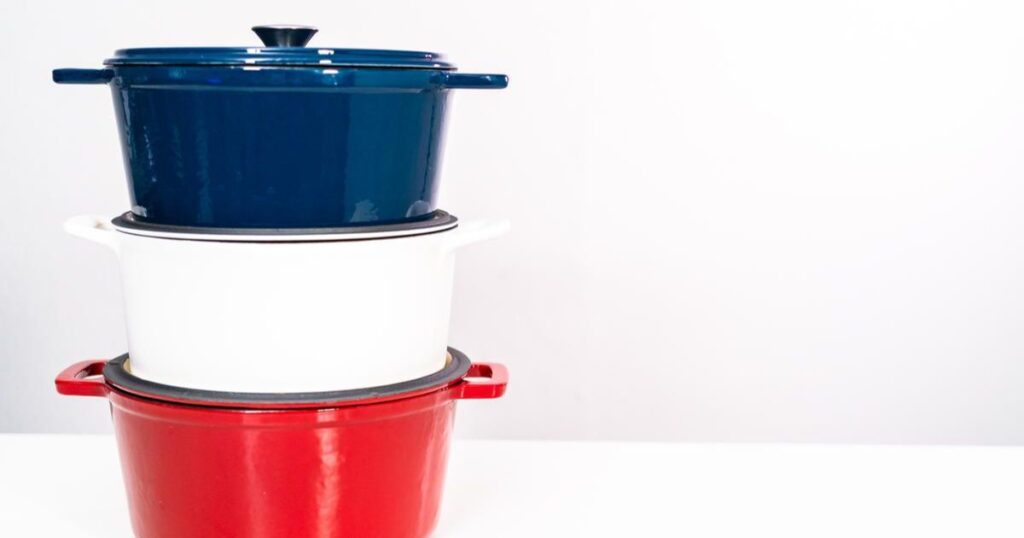
Firstly, Dutch ovens are known for their excellent heat retention capabilities. Made from heavy-duty cast iron, they distribute heat evenly, ensuring consistent cooking temperatures throughout the cooking process. This means your food will be perfectly cooked, with a crispy exterior and tender interior.

Secondly, a deep and wide Dutch oven allows for ample oil capacity. This means you can fry larger batches of food at once, making it an ideal choice for gatherings or when you have a hungry crowd to feed. Moreover, the high walls of the Dutch oven prevent oil splatters, providing a safer and cleaner frying experience.

Additionally, Dutch ovens come with a tight-fitting lid that helps trap heat and moisture, creating a controlled cooking environment. This is especially beneficial for deep frying, as it helps seal in flavors and prevents excessive oil absorption, resulting in lighter and less greasy fried foods.

Lastly, a Dutch oven is a versatile kitchen tool for various cooking methods, including braising, stewing, and baking. So, investing in a Dutch oven means you’re not limited to deep frying; you can explore various culinary possibilities.

Choosing the Right Dutch Oven for Deep Frying

When it comes to deep frying, selecting the right Dutch oven is crucial for achieving optimal results. With various options available in the market, it’s essential to consider a few critical factors before purchasing. Here’s a guide to help you choose the perfect Dutch oven for your deep frying adventures.

Size Matters: 

The size of the Dutch oven is an important consideration. Depending on your cooking needs, you’ll want to select a size that can accommodate the quantity of food you typically fry. A larger Dutch oven with a higher oil capacity would be ideal if you often cook for a large family or host gatherings. However, a more compact size might suffice if you primarily cook for smaller groups.

Material and Construction: 

Dutch ovens come in different materials, including cast iron, stainless steel, and enameled cast iron. Cast iron Dutch ovens are known for their excellent heat retention but require Seasoning and maintenance. Stainless steel options offer durability and are easier to clean. Enameled cast iron combines the benefits of both materials, providing heat retention and a non-reactive cooking surface. Consider your preferences and cooking style when choosing the material.

Handles and Lid: 

Pay attention to the handles and lid design of the Dutch oven. Sturdy and heat-resistant handles are essential for safe handling, especially when dealing with hot oil. Additionally, a tight-fitting lid helps retain heat and moisture during deep frying, enhancing the cooking process.

Compatibility with Stovetops and Ovens: 

Check if the Dutch oven is compatible with your stovetop and oven. Most Dutch ovens work well on gas and electric stovetops, but not all are suitable for induction cooktops. Similarly, ensure the Dutch oven is oven-safe if you plan to finish cooking or keep your fried dishes warm in the oven.

Brand and Reviews: 

Consider reputable brands known for their quality Dutch ovens. Read customer reviews and feedback to gain insights into the product’s performance, durability, and overall satisfaction. This will help you decide and select a Dutch oven that meets your expectations.

Considering these factors, you can choose a Dutch oven that aligns with your deep frying needs. Investing in a high-quality Dutch oven will enhance your cooking experience and pave the way for deliciously fried treats. 

Preparing the Dutch Oven for Deep Frying

Before you embark on your deep frying journey with a Dutch oven, it’s crucial to properly prepare the equipment to ensure safety and optimal cooking results. Follow these essential steps to get your Dutch oven ready for deep frying.

Clean and Dry: 

Start by thoroughly cleaning your Dutch oven. Remove any dust, dirt, or residue from the surface. Use warm water, mild dish soap, and a non-abrasive sponge or cloth to scrub the interior and exterior of the pot gently. Rinse it well and dry it thoroughly to prevent water from mixing with the hot oil during frying.

Seasoning (If Required): 

If you’re using a cast iron Dutch oven, it may require seasoning to create a non-stick surface and prevent rusting. Follow the manufacturer’s instructions for seasoning or re-seasoning your Dutch oven. Typically, this involves applying a thin layer of cooking oil to the interior and heating it at a specific temperature for a particular duration. Seasoning helps enhance the durability and performance of your Dutch oven.

Select the Right Oil: 

Choosing the right oil is crucial for deep frying. Opt for oils with high smoke points, such as vegetables, peanuts, or canola. These oils can withstand high temperatures without breaking down and imparting unwanted flavors to your food. Avoid oils with low smoke points, like olive oil or butter, as they can burn and smoke during deep frying.

Fill the Dutch Oven: 

Once your Dutch oven is clean and dry, it’s time to add the oil. Fill the Dutch oven with enough oil to submerge the food you’ll be frying. Be mindful of the oil’s capacity, ensuring it doesn’t overflow when added food. Leave some space at the top to prevent oil splatters when submerging food.

Heat Control: 

Place the Dutch oven on the stovetop over medium heat. Use a deep-fry or candy thermometer to monitor the temperature of the oil. A temperature range of 350-375°F (175-190°C) is recommended for most deep-frying recipes. Adjust the heat as needed to maintain a consistent temperature throughout frying.

Test the Oil: 

Before adding your food, it’s essential to test the oil temperature. Gently drop a small piece of bread or a cube of breaded food into the oil. If it starts sizzling and turns golden brown within 1-2 minutes, the oil is ready for frying. If it browns too quickly or slowly, adjust the heat accordingly and wait for the oil to reach the desired temperature.

By following these steps, you’ll ensure that your Dutch oven is adequately prepared for deep frying. A clean and well-seasoned Dutch oven, combined with the correct oil and controlled heat, sets the stage for successful deep-frying adventures. 

Preparing the Food for Deep Frying

Preparing the Food for Deep Frying

Now that your Dutch oven is ready, it’s time to focus on preparing the food for deep frying. Properly preparing the ingredients ensures even cooking, maximum flavor, and a crispy texture. Follow these steps to get your food ready for a delicious deep-frying experience.

Dry the Ingredients: 

Before you start frying, make sure the ingredients are dry. Excess moisture on the surface of the food can cause the hot oil to splatter and lead to uneven frying. Use paper towels or a clean kitchen towel to dry the ingredients, such as meats, vegetables, or seafood, before coating them with batter or breading.

Season and Marinate: 

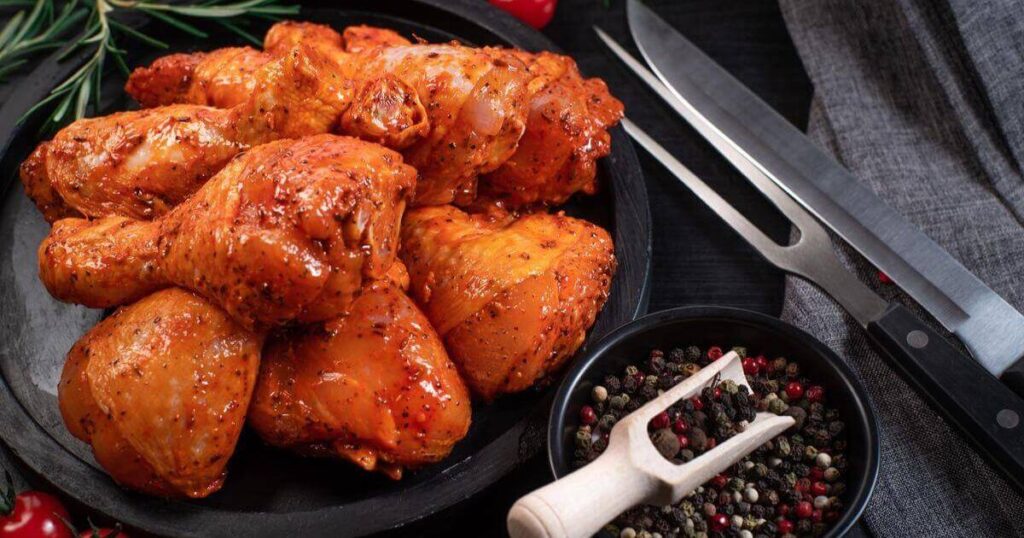
Add flavor to your fried dishes by seasoning or marinating the ingredients. Sprinkle them with your favorite seasonings, herbs, or spices to enhance the taste. For meats, consider marinating them in a mixture of spices, herbs, and liquids for added tenderness and flavor. According to your recipe, allow the ingredients to marinate for the recommended duration.

Coat with Batter or Breading: 

Coat the ingredients with a suitable batter or breading to achieve a crispy and golden exterior. You can use a tempura or beer batter for a light, airy coating. Alternatively, opt for a breadcrumb or flour-based breading for a thicker and crunchier coating. Dip each piece of ingredient into the batter or dredge it in the breading, ensuring it is evenly coated on all sides.

Resting Time: 

After coating the ingredients, it’s essential to let them rest briefly. This resting time allows the batter or breading to adhere better to the ingredients, resulting in a more uniform and crispy texture. Place the coated ingredients on a wire rack or a plate and let them sit for 10-15 minutes before frying.

Fry in Batches: 

Avoid overcrowding the Dutch oven by frying the food in batches. Overcrowding can lower the oil temperature and lead to greasy results. Carefully place a few pieces of the prepared ingredients into the hot oil, ensuring they are submerged but not touching each other. Fry them until they turn golden brown and reach the desired level of crispiness. Remove the fried pieces with a slotted spoon or tongs, allowing any excess oil to drain.

Drain and Rest: 

After frying, transfer the cooked food to a plate lined with paper towels. The paper towels absorb excess oil, helping to maintain the crispy texture. Allow the fried food to rest for a few minutes before serving. This resting time allows the flavors to settle and the heat to distribute evenly, ensuring a delightful eating experience.

By following these steps, you’ll ensure that your ingredients are prepared optimally for deep frying. Combining dry ingredients, well-seasoned coatings, and proper resting times contributes to perfectly fried dishes with a satisfying crunch.

How to Deep Fry with a Dutch Oven

Deep frying with a Dutch oven can seem daunting, but you can achieve crispy and delicious results with the proper techniques. Follow these step-by-step instructions to master the art of deep frying with a Dutch oven.

Preheat the Oil: Begin by preheating the oil in your Dutch oven. Place the Dutch oven on the stovetop over medium heat. Pour the desired amount of oil into the pot, ensuring it covers the food you’ll be frying. Use a deep-fry or candy thermometer to monitor the oil temperature. Heat the oil to the recommended temperature specified in your recipe or between 350-375°F (175-190°C) for most deep-frying purposes.

Test the Oil Temperature: To ensure the oil has reached the desired temperature, perform a quick temperature test. Gently drop a small piece of bread or a cube of breaded food into the oil. If it starts sizzling immediately and turns golden brown within 1-2 minutes, the oil is ready for frying. If the bread browns too quickly or slowly, adjust the heat accordingly and wait for the oil to reach the desired temperature before proceeding.

Carefully Add the Food: When the oil reaches the correct temperature, carefully add the prepared food to the Dutch oven. Lower the food into the hot oil using a slotted spoon or tongs to avoid splatters. Be mindful not to overcrowd the pot, which can cause the oil temperature to drop and result in greasy food. Fry the food in batches, allowing each piece enough space to cook evenly.

Maintaining the Oil Temperature: A consistent oil temperature is essential throughout frying. Adjust the heat to keep the oil within the recommended temperature range. Avoid drastic temperature fluctuations, as this can affect the texture and quality of the fried food. Monitoring the oil temperature with a thermometer and making minor adjustments will help you achieve optimal results.

Flip and Rotate: Once the food is in the oil, periodically flip and rotate the pieces for even browning and cooking. Use tongs or a slotted spoon to turn the food to the other side carefully. This ensures that all sides of the food receive equal heat, resulting in a uniform golden color and crispness.

Cook to Perfection: The cooking time will vary depending on the type and size of the food you’re frying. Follow the recipe guidelines or use visual cues to determine when the food is perfectly cooked. Look for a golden brown color and a crispy texture. Avoid overcooking, as it can lead to dryness and loss of flavor. Remove the cooked food from the oil using a slotted spoon or tongs, allowing any excess oil to drain.

Drain and Serve: Transfer the fried food to a plate lined with paper towels to absorb excess oil. This helps maintain the desired crispiness. Allow the food to rest for a few minutes before serving to ensure the flavors settle and the heat distributes evenly. Serve your delicious deep-fried creations while they’re still hot, and enjoy!

Following these step-by-step instructions, you’ll become adept at deep frying with a Dutch oven. Mastering the oil temperature, adding the food carefully, and cooking to perfection will result in delectable fried dishes that will impress your family and friends.

How to Clean a Dutch Oven After Deep Frying

How to Clean a Dutch Oven After Deep Frying

Cleaning a Dutch oven after deep frying is essential to maintain its quality and prolong its lifespan. The process involves removing excess oil, cleaning the inside of the Dutch oven, and restoring the Seasoning if necessary. Follow these steps to clean your Dutch oven after deep frying effectively.

Removing Excess Oil: 

Start by removing as much excess oil as possible from the Dutch oven. Carefully pour the remaining oil into a heat-resistant container, leaving any food particles or debris behind. Wipe the interior of the Dutch oven with paper towels or a clean cloth to soak up the excess oil. Dispose of the oil properly according to local regulations.

Cleaning the Inside of the Dutch Oven: 

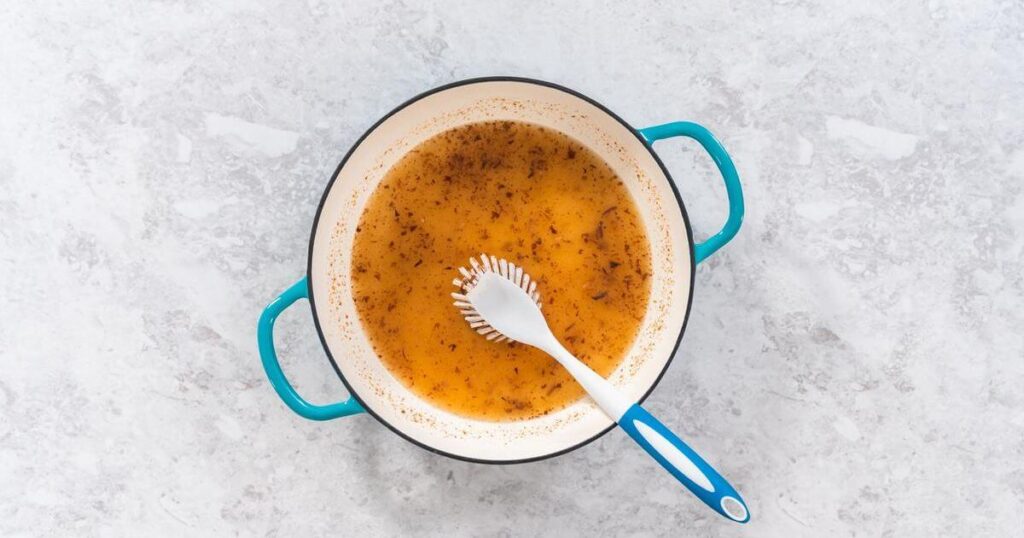
After removing the excess oil, it’s time to clean the inside of the Dutch oven. Fill the Dutch oven with warm water and add a small amount of mild dish soap. Use a non-abrasive sponge or cloth to gently scrub the interior, paying attention to any stubborn residue or stuck-on food. Avoid harsh scrubbing pads or abrasive cleaners, as they can damage the Seasoning or enamel coating, if applicable.

Restoring the Seasoning (if applicable): 

If you’re using a cast iron Dutch oven and notice that the Seasoning has been affected by the deep frying process, it’s essential to restore it. Scrub the Dutch oven with coarse salt and warm water to do this. The salt acts as a gentle abrasive to remove any buildup or residue. Rinse the Dutch oven thoroughly, ensuring all the salt is removed. Dry it thoroughly with a clean cloth or place it over low heat on the stovetop to evaporate any remaining moisture.

Drying and Storing: 

Once the Dutch oven is clean and dry, it’s crucial to prevent moisture buildup to avoid rusting. Place a clean cloth or paper towel inside the Dutch oven to absorb moisture. Store the Dutch oven in a dry and well-ventilated area to ensure proper air circulation. If necessary, lightly coat the interior with a thin layer of cooking oil to help maintain the Seasoning and prevent rust.

Following these steps, you can effectively clean your Dutch oven after deep frying. Removing excess oil, cleaning the inside of the Dutch oven, and restoring the Seasoning if applicable will help maintain the quality and longevity of your Dutch oven. Your Dutch oven will serve you well in your culinary adventures with proper care.

Dutch Oven Care and Maintenance

Proper care and maintenance of your Dutch oven are crucial for its longevity and optimal performance. Whether you use it for deep frying or other cooking methods, following these care guidelines will ensure that your Dutch oven remains in excellent condition for years.

Seasoning Maintenance: A cast iron Dutch oven requires periodic Seasoning to maintain its non-stick surface and prevent rust. After each use, clean the Dutch oven using warm water and mild dish soap, if needed. Avoid using harsh scrubbers or abrasive cleaners that can strip away the Seasoning. 

Once clean, dry the Dutch oven thoroughly and apply a thin layer of cooking oil to the interior and exterior surfaces. This helps protect against moisture and rust. Place the Dutch oven upside down in an oven preheated to 350°F (175°C) for about an hour to allow the oil to polymerize and create a protective coating. Repeat this seasoning process as needed to maintain the Seasoning.

Avoid Drastic Temperature Changes: Avoid exposing your Dutch oven to drastic temperature changes to prevent cracking or warping. Allow it to cool naturally before immersing it in water or transferring it from a hot stovetop to a cold surface. Sudden temperature fluctuations can damage the Dutch oven and affect its performance.

Hand Washing Preferred: It is generally recommended to hand wash your Dutch oven rather than using a dishwasher. Dishwashers can subject the Dutch oven to harsh chemicals and high heat, which may degrade the Seasoning or enamel coating. Clean the Dutch oven using warm water, mild dish soap, and a non-abrasive sponge or cloth. Dry it thoroughly to prevent moisture-related issues.

Proper Storage: When storing your Dutch oven, ensure it is scorched to avoid rusting. Place a paper towel or a clean cloth inside to absorb any moisture. Store the Dutch oven in a cool, dry place with adequate ventilation. If stacking multiple Dutch ovens, place a paper towel or a silicone mat between them to prevent scratching or chipping.

Regular Inspection: Inspect your Dutch oven for any wear, damage, or rust. If you notice any issues, address them promptly. For cast iron Dutch ovens, re-seasoning may be necessary if the Seasoning has worn off or become damaged.

Following these care and maintenance tips, you can keep your Dutch oven in excellent condition and enjoy its cooking benefits for years. Proper seasoning maintenance, avoiding temperature shocks, hand washing, proper storage, and regular inspections are vital to preserving the quality and longevity of your Dutch oven.

Frequently Asked Questions

Can you use a Dutch oven for deep frying on a gas stove? 

Yes, a Dutch oven can be used for deep frying on a gas stove. The heavy-duty construction of Dutch ovens, such as those made of cast iron, allows them to withstand high heat, making them suitable for deep frying on a gas stove.

Can a Dutch oven be used for deep-frying? 

Yes, a Dutch oven can be used for deep frying. Its deep and comprehensive design and excellent heat retention make it an ideal choice for deep frying various foods.

Can you use a Dutch oven like a frying pan? 

While a Dutch oven and a frying pan serve different purposes, you can use a Dutch oven similarly to a frying pan. However, due to its larger size and deeper walls, a Dutch oven may require more oil and be better suited for frying larger batches of food.

Can you deep fry chicken in a Dutch oven? 

Absolutely! A Dutch oven is an excellent tool for deep frying chicken. Its heat retention and ample capacity make it suitable for achieving crispy and juicy fried chicken.

Is a work better than a Dutch oven for deep-frying? 

A wok and a Dutch oven can be used for deep frying, but they have different characteristics. A wok is designed for stir-frying with sloping sides, allowing quick and efficient cooking. On the other hand, a Dutch oven’s deeper walls and excellent heat retention make it better for frying larger batches of food and maintaining consistent temperatures throughout the frying process. Choosing between a wok and a Dutch oven for deep frying depends on personal preference and specific cooking needs.

Conclusion

Using a Dutch oven for deep frying is a game-changer in the kitchen. Its excellent heat retention, generous oil capacity, and safety features make it ideal for achieving crispy and delicious results. You can elevate your deep-frying skills by following the step-by-step instructions for preparing the Dutch oven, preparing the food, deep frying, and cleaning and maintaining the Dutch oven. 

Whether frying chicken, vegetables, or other delectable treats, a Dutch oven is a versatile tool to help you create mouthwatering dishes. With proper care and attention, your Dutch oven will continue to be a reliable companion in your culinary adventures for years to come. Happy deep frying!

How to Clean an OXO Salad Spinner: A Complete Guide 2023

Welcome to our comprehensive guide on how to clean an OXO Salad Spinner! Keeping your salad spinner clean is essential for maintaining its functionality and ensuring the freshness of your greens. This article will walk you through step-by-step instructions on effectively cleaning your OXO Salad Spinner, allowing you to enjoy crisp and clean salads every time. 

Whether you’re a seasoned salad enthusiast or new to using a salad spinner, this guide will provide all the information you need to keep your OXO Salad Spinner in pristine condition. Let’s dive in and discover the best practices for cleaning your salad spinner.

Understanding What is OXO Salad Spinner

A salad spinner is a kitchen tool designed to efficiently remove excess water from freshly washed salad greens and vegetables. The OXO Salad Spinner is a famous and reliable brand that offers a range of salad spinners designed for home use.

The OXO Salad Spinner features a unique design that combines simplicity, functionality, and durability. It typically consists of three main parts: a large bowl, a perforated basket, and a lid with a spinning mechanism. The basket fits inside the bowl, and the lid securely locks into place, allowing you to spin the basket quickly.

When you spin wet salad greens or vegetables into the basket, the spinning motion’s centrifugal force helps remove excess water from the produce. This process makes your greens drier and crisper and ensures that dressings adhere better to the leaves for a more enjoyable salad experience.

OXO Salad Spinners are known for their user-friendly features, such as a non-slip base and an easy-to-use brake button that brings the spinning motion to a halt. The high-quality materials used in their construction make them sturdy and long-lasting.

Now that we have a basic understanding of what an OXO Salad Spinner is, let’s explore how to clean and maintain this handy kitchen tool to keep it in optimal condition.

The Importance of Regular Cleaning

The Importance of Regular Cleaning

Keeping your OXO Salad Spinner clean is crucial for maintaining its performance and ensuring hygiene and food safety. Here are some reasons why regular cleaning is essential:

Hygiene and Food Safety Concerns: Salad spinners come into direct contact with your fresh produce, and any dirt, bacteria, or contaminants on the spinner can transfer to your food. Regular cleaning helps remove potential pathogens or residues, keeping your salads safe to consume.

Freshness and Flavor Preservation: Cleaning your salad spinner after each use prevents any leftover moisture or residue from accumulating. This ensures your greens stay fresh longer and helps preserve their natural flavors.

Preventing Cross-Contamination: Cleaning it thoroughly between uses is essential if you use your salad spinner for different greens or vegetables. This helps prevent cross-contamination, ensuring that flavors and odors don’t mix and maintaining the integrity of each ingredient.

So, how often should you clean your salad spinner? The general recommendation is to clean it after each use. Regularly cleaning your OXO Salad Spinner can maintain its cleanliness, prolong its lifespan, and promote a healthy kitchen environment.

Materials Needed for Cleaning OXO Salad Spinner

Before you begin the cleaning process, gather the following materials:

Mild Dish Soap: Opt for a gentle, non-abrasive dish soap for cleaning kitchen utensils. Avoid harsh chemicals or abrasive cleaners, which can damage the spinner’s components.

Warm Water: You’ll need warm water to rinse and wash the salad spinner. Ensure the water is not too hot, as it may warp or distort the plastic parts of the spinner.

Soft Cleaning Brush or Sponge: A soft-bristle brush or sponge will help you scrub any residue or debris from the spinner’s surfaces without causing scratches.

Clean Towels or Paper Towels: Keep some clean, absorbent towels or paper towels nearby to dry the salad spinner after cleaning. This will help prevent any moisture from lingering, which can lead to mold or mildew growth.

Having these materials ready will streamline the cleaning process and ensure you have everything you need to clean your OXO Salad Spinner effectively. With the right tools, let’s follow the step-by-step instructions for cleaning your salad spinner thoroughly.

Steps for Cleaning an OXO Salad Spinner

To ensure thorough cleaning of your OXO Salad Spinner, follow these step-by-step instructions:

  1. Disassemble the Spinner: Start by separating the three main parts of the salad spinner—the bowl, the basket, and the lid. Carefully remove the basket from the bowl and set the lid aside.
  2. Rinse the Parts in Warm Water: Rinse each part under warm water to remove any loose debris or food particles. Pay close attention to the crevices and corners where dirt or residue may accumulate.
  3. Apply the Cleaning Agent: Add a few drops of mild dish soap to the bowl and fill it with warm water. Submerge the basket and lid into the soapy water, ensuring they are fully covered.
  4. Scrub the Parts with a Brush or Sponge: Take a soft-bristle brush or sponge and gently scrub all the basket, lid, and bowl surfaces. Pay extra attention to any areas that may have stubborn residue. Avoid using abrasive materials that could scratch or damage the spinner.
  5. Rinse Thoroughly With Water: Once you’ve scrubbed all the parts, rinse them thoroughly with clean water to remove any soap residue. Ensure that no soapy water remains, as it can affect the taste and freshness of your greens.
  6. Dry with a Microfiber Cloth or Towel: Use a clean, dry microfiber cloth or towel to pat dry all the parts of the salad spinner. Make sure to remove any excess moisture to prevent mold or mildew growth.
  7. Reassemble the Spinner: Once the parts are arid, reassemble the salad spinner by placing the basket back into the bowl. Ensure that it fits securely and that the lid locks into place.

Following these steps, you can effectively clean your OXO Salad Spinner and maintain its cleanliness and functionality. Regular cleaning will help extend the lifespan of your spinner and ensure that your salads are fresh and safe to enjoy.

Tips for Deep Cleaning

Tips for Deep Cleaning

While regular cleaning will keep your OXO Salad Spinner in good condition, there are times when you may need to tackle stubborn stains or odors. Here are some tips for deep cleaning your salad spinner:

Removing Stubborn Stains or Odors: 

You can try a few methods if you notice stubborn stains or lingering odors in your salad spinner. One option is to create a paste using baking soda and water. Apply the paste to the affected areas, let it sit for a few minutes, then scrub with a soft brush or sponge. Rinse thoroughly with water. 

Another method is to soak the parts in warm water and vinegar. Vinegar’s acidity can help break down stains and neutralize odors. After soaking, scrub and rinse as usual.

Using Vinegar or Baking Soda: 

Vinegar and baking soda are natural cleaning agents that effectively clean your salad spinner. Vinegar can help remove stains and odors, while baking soda is a gentle abrasive. Rinse the parts thoroughly with water after using vinegar or baking soda to avoid lingering taste or residue.

Disinfecting with Bleach: 

If you want to disinfect your salad spinner, you can use a diluted bleach solution. Mix one tablespoon of bleach with one gallon of water. Submerge the parts in the solution for a few minutes, then rinse thoroughly with water. Be sure to follow safety precautions when working with bleach, such as wearing gloves and ensuring proper ventilation.

Always refer to the manufacturer’s instructions and guidelines before using any cleaning agents on your OXO Salad Spinner. Additionally, take note of any specific recommendations or restrictions provided by OXO to ensure you maintain the warranty and integrity of your salad spinner.

By incorporating these deep cleaning tips, you can keep your OXO Salad Spinner in top-notch condition and enjoy fresh, clean salads every time.

Maintenance and Care

To ensure the longevity and optimal performance of your OXO Salad Spinner, it’s essential to follow proper maintenance and care practices. Here are some tips to keep in mind:

Regular Cleaning: As discussed earlier, regular cleaning after each use is essential. By promptly cleaning your salad spinner, you prevent residue buildup and maintain cleanliness.

Thorough Drying: After cleaning, thoroughly dry all parts of the salad spinner. Moisture left behind can promote the growth of mold or mildew. Use a clean towel or allow the parts to air dry before reassembling.

Avoid Harsh Chemicals and Abrasives: Refrain from using harsh chemicals or abrasive cleaners when cleaning your salad spinner. These can damage the plastic components and compromise the spinner’s functionality. Stick to mild dish soap and non-abrasive cleaning tools.

Store Properly: Store your OXO Salad Spinner in a cool, dry place when not in use. Avoid exposing it to direct sunlight or extreme temperatures, which can cause warping or discoloration.

Handle with Care: Treat your salad spinner carefully to avoid accidental damage. Avoid dropping or mishandling the parts, especially the bowl and lid, as they may crack or break.

Check for Wear and Tear: Regularly inspect your salad spinner for signs of wear and tear. Pay attention to the spinning mechanism, the lid’s locking mechanism, and the plastic components’ condition. If you notice any damage, contact the manufacturer for guidance on repair or replacement.

By following these maintenance and care tips, you can ensure that your OXO Salad Spinner remains in excellent condition and provides you with many years of reliable use. Consider the product manual or OXO’s official guidelines for specific care instructions tailored to your model.

Common Mistakes to Avoid

Common Mistakes to Avoid

While cleaning and maintaining your OXO Salad Spinner, it’s essential to avoid common mistakes that can potentially damage the spinner or affect its performance. Here are some mistakes to steer clear of:

Using Harsh Cleaning Agents: Avoid harsh cleaning agents, such as bleach, ammonia, or abrasive chemicals. These can damage the plastic components and leave behind harmful residues that may affect the taste and safety of your salads. Stick to mild dish soap or natural cleaning agents for gentle yet effective cleaning.

Using Abrasive Sponges or Brushes: Opt for soft-bristle brushes or sponges when scrubbing the parts of your salad spinner. Abrasive materials can scratch or damage the surfaces, compromising the spinner’s functionality and cleanliness. Be gentle and use non-abrasive cleaning tools to maintain the integrity of your salad spinner.

Submerging the Spinner in Water: Avoid fully submerging your salad spinner, especially the lid and spinning mechanism. While the bowl and basket can be submerged for cleaning, excessive water exposure to other parts may cause damage to the spinner’s mechanical components or compromise its functionality. Stick to rinsing and cleaning the spinner without fully immersing it.

By avoiding these common mistakes, you can ensure that your OXO Salad Spinner remains in excellent condition and continues to serve you well in preparing fresh and delicious salads.

Frequently Asked Questions

Can I clean my OXO salad spinner in the dishwasher? 

OXO Salad Spinners are not dishwasher-safe. It is recommended to hand wash the parts using mild dish soap and warm water. Dishwashers can expose the spinner to harsh chemicals, high temperatures, and abrasive conditions, which may damage the plastic components or affect the spinner’s functionality.

Is it safe to use bleach on my salad spinner? 

While bleach can be effective for disinfection, using bleach directly on your salad spinner is generally not recommended. Bleach may cause discoloration or damage to the plastic components. Instead, use milder cleaning methods, like mild dish soap or vinegar solution, for regular cleaning and maintenance.

How do I remove rust from my spinner?

If you notice rust on your salad spinner, the spinner’s metal parts have likely oxidized. Unfortunately, removing rust may be challenging and affect the spinner’s functionality and hygiene. It is recommended to contact the manufacturer or refer to the product’s warranty for guidance on addressing rust issues or considering a replacement if necessary.

How often should I replace my salad spinner?

The lifespan of a salad spinner can vary depending on its usage, quality, and maintenance. Your OXO Salad Spinner should last an extended period with proper care and regular cleaning. However, if you notice significant wear and tear, broken parts, or compromised functionality, consider replacing your salad spinner.

How do you close an OXO salad spinner? 

To close an OXO Salad Spinner, ensure the basket is inside the bowl, and the lid is appropriately aligned. Press the lid firmly until you hear a click or feel it lock into place. The lid is designed to securely seal the salad spinner, allowing you to quickly spin the basket and prevent any splattering of water or greens.

Conclusion

Cleaning your OXO Salad Spinner is essential for maintaining its functionality and hygiene and ensuring fresh and crisp salads. You can keep your salad spinner in excellent condition by following the step-by-step cleaning process, using suitable materials, and avoiding common mistakes. 

Regular maintenance and care, such as thorough drying and proper storage, will contribute to its longevity. Remember to refer to the manufacturer’s instructions and guidelines for specific care recommendations. You can enjoy delicious and healthy salads with a clean, well-maintained OXO Salad Spinner.

The Ultimate Guide to Choosing The Perfect Roasting Pan for Ribs

0

Are you a barbecue enthusiast? Do you love indulging in succulent, juicy ribs cooked to perfection? If so, you know the right roasting pan for ribs is essential. Choosing the perfect roasting pan can make all the difference in achieving tender, flavorful ribs that will impress your friends and family. 

This comprehensive guide will walk you through everything you need to know to select the ideal roasting pan for ribs. We’ve covered you, from materials and size considerations to features and maintenance tips. So, let’s dive in and discover the ultimate guide to choosing the perfect roasting pan for ribs.

Types of Roasting Pans

Roasting pans come in various types, each offering unique advantages and considerations. Let’s explore some of the most common types of roasting pans:

Stainless Steel Roasting Pans

Stainless steel roasting pans are popular among home cooks and professional chefs. They are known for their durability, excellent heat conductivity, and corrosion resistance. Stainless steel pans are versatile and can be used for various cooking tasks, making them a reliable option for roasting ribs.

Cast Iron Roasting Pans

Cast iron roasting pans are beloved for their exceptional heat retention properties. They distribute heat evenly, ensuring that your ribs are cooked consistently. Cast iron pans require proper seasoning and maintenance, but they offer unparalleled heat retention and can impart a distinct flavor to your ribs.

Non-Stick Roasting Pans

Non-stick roasting pans are convenient for easy cleanup and minimal oil or fat usage. These pans feature a non-stick coating that prevents food from sticking, making it effortless to remove the ribs once they are done. However, choosing a high-quality non-stick pan that can withstand high temperatures without compromising its coating is essential.

Disposable Aluminum Roasting Pans

Disposable aluminum roasting pans are a practical option when convenience is a priority. These lightweight pans are affordable and eliminate the need for cleanup, as they can be discarded after use. While they may not offer the same durability and heat distribution as other types, disposable aluminum pans can still produce satisfactory results when roasting ribs.

Consider your cooking preferences, budget, and specific recipe requirements when choosing the type of roasting pan that suits you best. Each type has its benefits, so weigh the pros and cons to make an informed decision that will enhance your rib-roasting experience.

Features of a Perfect Roasting Pan for Ribs

Features of a Perfect Roasting Pan for Ribs

To choose the perfect roasting pan for ribs, it’s essential to consider several vital features that can significantly enhance your cooking experience. Let’s explore these features in detail:

Size and Capacity: 

The size of the roasting pan is crucial to ensure that your ribs fit comfortably without overcrowding. A too-small pan may result in uneven cooking, while a vast pan may lead to excessive evaporation and dryness. Consider the number of ribs you typically cook and choose a roasting pan with the appropriate capacity to accommodate them.

Material and Durability: 

The roasting pan’s material is vital in its durability and performance. Stainless steel cast iron, and aluminum are popular choices. Stainless steel pans are durable and corrosion-resistant, while cast iron provides excellent heat retention. Aluminum pans are lightweight and heat up quickly. Assess the pros and cons of each material to determine the best fit for your needs.

Heat Conductivity and Retention: 

Efficient heat conductivity ensures that your ribs cook evenly throughout. Look for a roasting pan with materials that distribute heat evenly, preventing hot spots and ensuring consistent cooking. Additionally, consider the pan’s heat retention capabilities, as this can affect the tenderness and texture of your ribs.

Handles and Grip: 

A well-designed roasting pan should have sturdy and heat-resistant handles that provide a secure grip. This makes moving the pan in and out of the oven more accessible, even when it’s hot. Ergonomic handles with sufficient space for your hands will ensure safety and convenience during cooking.

Rack or No Rack: 

Some roasting pans come with a rack, which elevates the ribs above the pan’s base. A rack promotes air circulation, allowing heat to reach all sides of the ribs and resulting in even cooking. If you prefer a crispy crust on your ribs, a rack can help achieve that desirable texture. However, if you prefer the ribs to be cooked directly in the pan’s juices, a roasting pan without a rack may be more suitable.

Easy to Clean: 

Cleaning up after cooking is never enjoyable, so opt for a roasting pan that is easy to clean. Look for pans with non-stick coatings or stainless steel surfaces resistant to staining. Dishwasher-safe pans can save time and effort, but checking the manufacturer’s instructions is vital to ensure proper care.

Consider these features when selecting a roasting pan for ribs, considering your cooking preferences and specific needs. By choosing a roasting pan that excels in these areas, you’ll be well on your way to mouthwatering, perfectly cooked ribs every time.

Factors to Consider when Choosing a Roasting Pan for Ribs

When selecting a roasting pan for ribs, there are several factors to consider that can significantly impact your cooking results. Let’s delve into these critical factors:

Cooking Method (Dry Rub, Wet Rub, or Smoking): 

The cooking method you prefer for your ribs will influence the type of roasting pan you choose. If you opt for a dry rub, a pan with a rack or elevated design can help promote air circulation and achieve a crispy exterior. For wet rubs or smoking methods, a pan with deeper sides and a tight-fitting lid can help contain the flavors and retain moisture during cooking.

Cooking Time and Temperature: 

Consider the cooking time and temperature required for your rib recipe. Some roasting pans are better suited for longer cooking at lower temperatures, while others excel at higher heat levels. Ensure the roasting pan you choose can withstand the temperatures required for your preferred cooking method without warping or compromising its performance.

Ribs Size and Quantity: 

The size and quantity of ribs you typically cook will dictate the size of the roasting pan you need. Ensure that the pan can comfortably accommodate the ribs without overcrowding, allowing for even cooking and proper airflow. It’s better to choose a slightly larger pan to have ample space rather than trying to squeeze in too many ribs.

Oven Size and Type: 

Consider the size of your oven and its heating capabilities. Ensure that the roasting pan you choose fits comfortably within your oven without any risk of touching the sides or back. Additionally, if you have a convection oven, a roasting pan with high heat conductivity and even heat distribution will complement its performance.

Budget: 

Set a budget for your roasting pan and consider the options within that range. Roasting pans come in various price ranges, so determine the features and quality that are most important to you. While investing in a high-quality pan can enhance your cooking experience, affordable options can still deliver satisfactory results.

Considering these factors, you can choose a roasting pan that aligns with your preferred cooking method, accommodates the size and quantity of your ribs, fits your oven, and suits your budget. This thoughtful selection will contribute to the success of your rib-roasting endeavors and ensure a delightful dining experience for you and your guests.

How to Use a Roasting Pan for Ribs

How to Use a Roasting Pan for Ribs

Using a roasting pan for ribs requires proper preparation and attention to detail. Let’s walk through the steps to achieve deliciously cooked ribs:

Preparing the Ribs: Before placing the ribs in the roasting pan, properly prepare them. Remove the membrane from the back of the ribs for better tenderness and flavor penetration. Season the ribs with your preferred dry rub or marinade, ensuring they are evenly coated. Allow the ribs to marinate for at least an hour or overnight in the refrigerator to enhance the flavors.

Preparing the Pan: Prepare the roasting pan by ensuring it is clean and dry. Place a rack in the pan to elevate the ribs and allow for even heat circulation. If not using a rack, apply a light coat of oil or cooking spray to the pan’s surface to prevent the ribs from sticking.

Adding Liquid or Flavorings: Consider adding liquid or flavorings to the roasting pan for enhanced taste and moisture. You can pour in a small amount of broth, beer, wine, or a combination of these liquids to create a flavorful steam during cooking. Additionally, you can add aromatics such as onions, garlic, herbs, or citrus slices to infuse the ribs with extra flavors.

Roasting Time and Temperature: Preheat your oven to the appropriate temperature based on your recipe. Place the prepared roasting pan with the ribs in the oven and allow them to cook according to the recommended cooking time. It’s essential to follow the recipe instructions closely to ensure the ribs are perfectly cooked.

Checking for Doneness: Check the doneness of the ribs using a meat thermometer. The internal temperature should reach around 190°F (88°C) for tender, fall-off-the-bone ribs. Ensure the thermometer is inserted into the thickest part of the meat without touching the bone. You can also visually inspect the ribs for a desired caramelized crust.

Resting and Serving: Once the ribs reach the desired doneness, remove them from the oven and rest for a few minutes. This resting period helps the juices redistribute, producing more flavorful and moist ribs. After resting, carefully transfer the ribs to a cutting board and slice them into portions. Serve your delicious ribs with your favorite side dishes or barbecue sauce.

Following these steps, you can make the most of your roasting pan and create tender, flavorful ribs that impress your family and friends. Enjoy the fruits of your labor and savor the deliciousness of perfectly roasted ribs.

Tips for Maintaining Your Roasting Pan

To ensure the longevity and optimal performance of your roasting pan, it’s essential to follow proper maintenance practices. Here are some helpful tips for maintaining your roasting pan:

Cleaning and Storage: 

After each use, clean your roasting pan thoroughly. Allow it to cool down before washing it with warm soapy water. Use a non-abrasive sponge or cloth to avoid scratching the surface. For stubborn food residue, soak the pan in warm water before scrubbing. Once cleaned, ensure the pan is completely dry before storing it to prevent moisture buildup, which can lead to rust or corrosion.

Seasoning Cast Iron Roasting Pans: 

If you own a cast iron roasting pan, it’s crucial to season it periodically to maintain its non-stick properties and prevent rust. After cleaning the pan, apply a thin vegetable oil or shortening layer to the surface, including the sides and handle. Place the pan upside down in a preheated oven at a low temperature (around 300°F or 150°C) for about an hour. This process will help create a protective layer that enhances the pan’s performance and prevents food from sticking.

Avoiding Scratches and Damage: 

To avoid scratching the surface of your roasting pan, use non-metallic utensils such as silicone or wooden spatulas. Metal utensils can cause scratches, especially in non-stick pans, compromising effectiveness. Additionally, avoid using abrasive cleaners or scouring pads that can damage the pan’s coating or finish.

Using Proper Utensils: 

When handling your roasting pan, use oven mitts or potholders to protect your hands from hot surfaces. Avoid placing the pan directly on a countertop or other delicate surfaces to prevent potential heat damage. Instead, use trivets or heat-resistant pads to protect your kitchen surfaces.

Following these maintenance tips, you can keep your roasting pan in excellent condition and extend its lifespan. Proper cleaning, seasoning (for cast iron pans), avoiding scratches, and using the proper utensils will help you enjoy delicious meals with your reliable roasting pan.

Frequently Asked Questions (FAQs)

What pan is best for roasting ribs? 

The best pan for roasting ribs depends on personal preference and cooking style. Stainless steel, cast iron, and non-stick pans are popular choices. Stainless steel offers durability and even heat distribution, while cast iron provides excellent heat retention. Non-stick pans are convenient for easy cleanup. Consider your needs and cooking preferences when choosing the best pan for roasting ribs.

Can you use a roasting pan for ribs?

Yes, a roasting pan is an ideal tool for cooking ribs. It provides a spacious cooking vessel with racks, elevated designs, and deep sides that help achieve even heat distribution and promote proper airflow. A roasting pan is designed explicitly for roasting meats, making it a suitable choice for cooking ribs to perfection.

How to cook ribs in a roaster pan?

To cook ribs in a roaster pan, start by preparing the ribs with your preferred seasoning or marinade. Place the ribs in the roasting pan, ensuring they are not overcrowded. If using a rack, place it in the pan before adding the ribs. Roast the ribs in a preheated oven at the recommended temperature and cooking time, following your recipe’s instructions. Use a meat thermometer to check for doneness, and allow the ribs to rest before serving.

How do you use a rib roaster?

To use a rib roaster, place the ribs in the designated slots or grooves on the rib roaster rack, ensuring they are well-supported. Position the rack inside the roaster pan. The rib roaster helps elevate the ribs, allowing for even cooking and creating a flavorful crust. Follow your recipe’s temperature and cooking time instructions, and use a meat thermometer to check for doneness.

What material makes the best roasting pan?

The best material for a roasting pan depends on your specific needs and preferences. Stainless steel pans are durable and offer excellent heat distribution. Cast iron pans provide exceptional heat retention and can flavor the ribs. Non-stick pans are convenient for easy cleanup. Consider the pros and cons of each material and choose the one that aligns with your cooking style and requirements.

Conclusion

Choosing the perfect roasting pan for ribs is essential for achieving succulent, flavorful results. When selecting, consider size, material, heat conductivity, and handles. Different pans, such as stainless steel, cast iron, non-stick, or disposable aluminum, offer unique advantages. 

Follow proper maintenance practices to ensure the longevity of your roasting pan, including cleaning and storage, seasoning (for cast iron), and using the right utensils. With the right roasting pan and proper cooking techniques, you can enjoy mouthwatering ribs that impress your family and friends. Happy roasting!

How to Remove Melted Plastic Liner from Roaster Pan? (2023)

0

Are you dealing with the frustrating problem of a melted plastic liner stuck to your roaster pan? Don’t worry; we’ve got you covered. In this article, we’ll guide you through the step-by-step process of removing that stubborn melted plastic liner so that you can get your roaster pan back in pristine condition. 

Whether it’s due to an accidental mishap or a forgetful moment, we understand how annoying it can be. But fear not; you can tackle this issue effectively with a few simple techniques and some household items. Say goodbye to that sticky mess and hello to a clean and usable roaster pan once again.

What is a Melted Plastic Liner

Before we dive into the removal methods, let’s define what precisely a melted plastic liner is. A melted plastic liner refers to a thin layer of plastic material that has melted and adhered to the surface of a roaster pan. 

This can occur when a plastic liner, such as a disposable cooking bag or a plastic wrap, comes into direct contact with the hot surface of the pan during the cooking or baking process. The heat causes the plastic to melt, resulting in an unwanted, sticky mess.

Reasons why Plastic Liner Melts onto Roaster Pans

Understanding the reasons behind the melting of plastic liners onto roaster pans can help us prevent such incidents in the future. Several factors contribute to this problem:

High temperatures: Roaster pans are designed to withstand high temperatures, but some plastic materials have a lower melting point. These plastic liners can quickly melt and bond to the pan’s surface when exposed to excessive heat.

Accidental contact: Sometimes, while cooking or transferring food, the plastic liner may unknowingly come in direct contact with the hot roaster pan. This accidental contact leads to the plastic melting and sticking to the pan.

Forgetfulness: It’s easy to forget to remove a plastic liner before placing the roaster pan in the oven. The heat causes the plastic to melt, leaving you with a challenging cleaning task later on.

Materials Required for Removing Melted Plastic Liner

Materials Required for Removing Melted Plastic Liner

Before we delve into the techniques for removing a melted plastic liner from your roaster pan, let’s gather the necessary materials. The right tools and supplies will make the process much smoother. Here are the items you’ll need:

Heat-resistant gloves: Protecting your hands while working with hot surfaces is crucial. Heat-resistant gloves will shield your skin from burns and allow you to handle the roaster pan safely.

Safety goggles: Safety goggles provide eye protection and prevent plastic debris from accidentally entering your eyes. They are essential when using heat-related methods to remove the melted plastic liner.

Plastic scraper or spatula: A plastic scraper or spatula with a sturdy and flat edge will be your best friend in gently lifting and scraping off the melted plastic. Ensure the scraper is made of plastic to avoid scratching or damaging the roaster pan’s surface.

Ice cubes: Ice cubes will cool down the melted plastic and make it more solid and easier to handle during removal. Keep a tray of ice cubes ready nearby.

Plastic bag: You’ll need a plastic bag to dispose of the removed melted plastic. Ensure the bag is large enough to hold the plastic debris and seal it securely.

Dish soap: To thoroughly clean the roaster pan after removing the melted plastic liner, dish soap will be handy. Choose a gentle and effective dish soap suitable for your pan’s material.

Soft cloth or sponge: A soft cloth or sponge will be used to scrub the roaster pan and remove any remaining residue. Opt for a non-abrasive cloth or sponge to avoid scratching the surface.

By gathering these materials before starting the removal process, you’ll be well-prepared to tackle the melted plastic liner on your roaster pan. 

Steps to Follow for Removing Melted Plastic Liner Manually

Now that we have gathered the necessary materials, it’s time to explore different methods for removing the melted plastic liner from your roaster pan. The manual method is the way to go if you prefer a hands-on approach to remove the melted plastic liner from your roaster pan. Follow these step-by-step instructions for successful removal:

Allow the melted plastic to cool: Ensure the melted plastic has completely cooled down before proceeding. This will prevent potential burns and make the plastic more solid, making it easier to remove.

Put on heat-resistant gloves and safety goggles: Prioritize your safety by wearing heat-resistant gloves and safety goggles. These will protect your hands and eyes from any potential harm during removal.

Gently scrape off the plastic: Using a plastic scraper or spatula with a flat edge, gently scrape off the melted plastic from the surface of the roaster pan. Be careful not to apply excessive force or use sharp tools that could scratch or damage the pan.

Apply ice cubes: Place ice cubes directly on the affected areas for any stubborn remnants of melted plastic. The ice will help cool down the plastic, making it more solid and easier to chip away or lift off with the scraper.

Continue scraping and lifting: Persistently scrape and lift the melted plastic until you have removed all visible traces. Take your time and patience; this process may require effort and time to achieve the desired results.

Clean the pan: Once all the melted plastic has been removed, thoroughly wash the roaster pan with warm water and gentle dish soap. Use a soft cloth or sponge to scrub away any remaining residue. Rinse the pan well to ensure it is free from any soap residue, then dry it thoroughly before using it again.

Following these steps will help you manually remove the melted plastic liner from your roaster pan effectively. However, if you prefer an alternative method or encounter difficulty, the next section will guide you through the chemical approach to removing the plastic.

Steps to Follow for Removing Melted Plastic Liner Chemically

Steps to Follow for Removing Melted Plastic Liner Chemically

If you prefer using a chemical method to remove the melted plastic liner from your roaster pan, follow these step-by-step instructions:

Ensure proper ventilation and safety precautions: Before you begin, ensure you are in a well-ventilated area—open windows or doors to allow fresh air to circulate. Consider wearing gloves and safety goggles for added protection.

Select a suitable chemical remover: Choose a chemical remover that is safe to use on the material of your roaster pan. Options include nail polish removers, rubbing alcohol, or commercial adhesive removers. Read the product labels and follow the instructions carefully.

Apply the chemical remover: Apply a small amount of the chosen chemical remover to a soft cloth or sponge. Gently rub the affected areas of the roaster pan, focusing on the melted plastic. As per the product instructions, allow the chemical remover to sit for a few minutes to loosen the plastic.

Scrape off the plastic: Using a plastic scraper or spatula, carefully scrape off the loosened plastic from the surface of the roaster pan. Take your time and be cautious not to damage the pan. If needed, reapply the chemical remover and repeat the process until all the melted plastic is removed.

Clean the pan: After successfully removing the plastic, wash the roaster pan thoroughly with warm water and gentle dish soap. Rinse it well to ensure all traces of the chemical remover are gone. Dry the pan completely before using it again.

It’s essential to follow the safety precautions and instructions provided with the chemical remover to ensure proper usage. If you encounter any difficulties or are uncertain about using chemicals, consider seeking professional advice or opting for the manual method.

Tips on Preventing Future Occurrences of Melted Plastic Liner

While it’s helpful to know how to remove a melted plastic liner from your roaster pan, it’s even better to prevent it from happening in the first place. Here are some tips to help you avoid future occurrences:

Use appropriate cooking utensils: Opt for oven-safe cooking and pans designed explicitly for high-temperature cooking. Avoid using plastic wraps or bags that can quickly melt when exposed to heat.

Double-check before placing in the oven: Before placing your roaster pan in the oven, double-check that there are no plastic materials such as cooking bags, plastic wraps, or utensils inside. It’s easy to overlook these items, but a quick inspection can save you from the headache of dealing with melted plastic later on.

Protect the pan with aluminum foil: If you’re concerned about potential spills or drips during cooking, line your roaster pan with aluminum foil before placing the food inside. This extra layer will be a barrier, preventing direct contact between the food and the pan’s surface.

Monitor cooking temperatures: Be mindful of the recommended cooking temperatures for the materials used in your roaster pan. Avoid exceeding the recommended temperature limits, as this can increase the likelihood of plastic melting and sticking to the pan.

Remove food promptly: Once your cooking or baking is complete, remove the food from the roaster pan. Allowing the pan to cool down before removing the food reduces the chances of accidental contact between the food and the hot pan, minimizing the risk of melted plastic.

Clean the pan thoroughly: After each use, clean your roaster pan thoroughly using warm water and mild dish soap. This will help prevent residual food or grease from accumulating, potentially causing the plastic to stick to the pan during future cooking sessions.

These preventive measures can significantly reduce the chances of encountering a melted plastic liner on your roaster pan. Remember, prevention is always better than dealing with the aftermath of a mishap.

Now that you know how to remove and prevent melted plastic liners, you can confidently handle future situations. Enjoy your cooking and baking experiences without worrying about stubborn plastic clinging to your roaster pan.

FAQs

How can I prevent plastic liners from melting onto my roaster pan?

Use cooking utensils and pans designed explicitly for high-temperature cooking to prevent plastic liners from melting onto your roaster pan. Double-check that no plastic materials are inside the pan before placing it in the oven. Consider lining the pan with aluminum foil as an additional protective measure.

Is using chemicals to remove melted plastic liners from roaster pans safe?

When using chemicals to remove melted plastic liners, following the instructions with the specific product is essential. Choose a chemical remover that is safe to use on the material of your roaster pan and ensure proper ventilation. Take necessary safety precautions, such as wearing gloves and goggles.

Can a regular cleaner remove the melted plastic liner from my roaster pan?

While regular cleaners may be effective for general cleaning, they may not be specifically designed to remove melted plastic. It is recommended to use appropriate methods, such as the manual or chemical method, as discussed in this article, to remove melted plastic from roaster pans effectively.

Can a roaster pan be repaired with a melted plastic liner?

Unfortunately, once a roaster pan has a melted plastic liner, it is challenging to repair the pan itself. The focus should be on removing the melted plastic using the methods described in this article. If the damage is severe, it may be necessary to replace the roaster pan.

How do you get melted plastic off a roasting pan?

To remove melted plastic from a roasting pan, you can use the manual method by gently scraping the plastic with a plastic scraper or spatula, or you can use the chemical method by applying a suitable chemical remover to loosen the plastic. Both methods involve careful and patient removal techniques, as described in this article.

Conclusion

Dealing with a melted plastic liner on your roaster pan can be frustrating, but you can successfully remove it with the proper techniques and precautions. Whether you choose the manual or chemical method, following the step-by-step instructions will help restore your pan to its original condition. 

Additionally, implementing preventive measures such as using appropriate cooking utensils, monitoring temperatures, and cleaning your pan regularly can help avoid future occurrences. By being prepared and informed, you can confidently handle mishaps and enjoy hassle-free cooking and baking experiences with your roaster pan.

What is a Heavy Bottomed Saucepan | Explored Everything 2023

0

A heavy-bottomed saucepan is an essential kitchen tool every cooking enthusiast should have in their culinary arsenal. This sturdy and versatile cookware is designed to provide even heat distribution. It is ideal for various cooking techniques, from simmering sauces to boiling pasta or preparing delicate custards. 

A heavy-bottomed saucepan offers superior heat retention and precise temperature control. This article will explore everything you need to know about heavy-bottomed saucepans, their benefits, and how they can elevate your cooking experience in 2023 and beyond. So, let’s dive in and discover the wonders of this culinary workhorse!

What is a Heavy Bottomed Saucepan

A heavy-bottomed saucepan is a type of cookware with a thick, solid base, typically made of materials like stainless steel, copper, or aluminum. This robust construction distinguishes it from regular saucepans, which often have thinner bottoms.

The primary purpose of a heavy bottom in a saucepan is to provide enhanced heat distribution and retention. The thick base helps distribute heat evenly across the cooking surface, ensuring food cooks consistently without hot spots. This is particularly important when preparing delicate dishes that require precise temperature control, such as sauces, custards, or risottos.

The weight of a heavy-bottomed saucepan also contributes to its performance. The added heft provides stability and prevents the pan from easily tipping or wobbling on the stovetop. This stability is especially beneficial when stirring or whisking ingredients vigorously.

Furthermore, the design of a heavy-bottomed saucepan allows it to hold and maintain heat for extended periods. This quality is advantageous for tasks that require simmering or slow cooking, as the pan retains heat effectively, resulting in thorough and even cooking.

It’s worth noting that heavy-bottomed saucepans are available in various sizes, allowing you to choose the one that best suits your cooking needs. Whether you’re cooking for yourself or preparing a meal for a large gathering, there is a size that can accommodate your requirements.

How Does a Heavy-Bottomed Saucepan Work

How Does a Heavy-Bottomed Saucepan Work

A heavy-bottomed saucepan utilizes its unique design and construction to optimize heat distribution and retention. Let’s delve into the mechanics of how this type of cookware functions.

The critical component of a heavy-bottomed saucepan is its thick and solid base. Typically made from materials like stainless steel, copper, or aluminum, this base plays a crucial role in the pan’s performance. When placed on a heat source like a stovetop burner, the base absorbs and distributes the heat evenly across the cooking surface.

The thickness of the bottom ensures that heat is distributed uniformly, minimizing the risk of hot spots that can lead to uneven cooking. This is particularly important when preparing dishes requiring precise temperature control or dealing with ingredients prone to scorching.

The heat retention capability of a heavy-bottomed saucepan is also notable. Once the pan reaches the desired temperature, the thick base helps to maintain that heat for an extended period. This is advantageous for tasks that involve simmering, slow cooking, or keeping food warm for serving.

The weight of the saucepan contributes to its functionality as well. The heavier construction provides stability and prevents the pan from quickly shifting or tipping during cooking. This stability is particularly beneficial when stirring or whisking ingredients vigorously, ensuring a secure cooking experience.

To maximize the performance of a heavy-bottomed saucepan, it is recommended to use it in medium to low heat settings. The thick base efficiently conducts and retains heat, reducing the need for high heat levels. This not only helps to prevent food from sticking or burning but also conserves energy.

Types of Heavy-Bottomed Saucepans

When it comes to heavy-bottomed saucepans, there are several types available, each offering unique advantages and characteristics. Let’s explore some of the most common types:

Stainless Steel Saucepan

Stainless steel saucepans are popular among home cooks and professional chefs. They are known for their durability, corrosion resistance, and maintenance ease. Stainless steel pans with a heavy bottom provide excellent heat distribution and retention, allowing for precise temperature control during cooking. Also, stainless steel is non-reactive, making it suitable for preparing many dishes, including acidic or alkaline ingredients.

Copper Saucepan

Copper saucepans have long been prized for their exceptional heat conductivity. The copper construction ensures rapid and uniform heat distribution, which is particularly beneficial for delicate sauces or dishes that require precise temperature adjustments. Copper pans often feature a stainless steel or tin lining to prevent any reaction between copper and acidic foods. They also showcase an attractive, timeless aesthetic that adds a touch of elegance to any kitchen.

Aluminum Saucepan

Aluminum saucepans are lightweight, affordable, and excellent heat conductors. They heat up quickly and distribute heat evenly, resulting in efficient and consistent cooking. However, aluminum is a reactive metal, typically coated or anodized, to prevent interaction with certain ingredients. Aluminum pans with a heavy bottom are an excellent choice for everyday cooking, offering affordability and reliable performance.

Cast Iron Saucepan

Cast iron saucepans are renowned for their exceptional heat retention properties. While cast iron pans can be heavy, their weight contributes to their excellent heat distribution and durability. The heavy bottom of a cast iron saucepan allows for steady and even heat throughout the cooking process. These pans are ideal for slow cooking, simmering, or braising, as they hold heat exceptionally well and provide a consistent temperature.

It’s important to note that each heavy-bottomed saucepan type has unique characteristics and considerations. Factors such as heat conductivity, reactivity, maintenance requirements, and aesthetic appeal should be considered when selecting the most suitable saucepan for your cooking needs. 

Ultimately, the choice between stainless steel, copper, aluminum, or cast iron will depend on your preferences, cooking style, and desired outcomes in the kitchen.

Difference Between a Heavy Bottomed Saucepan and a Regular Saucepan

To better understand the unique qualities of a heavy-bottomed saucepan, let’s compare it with a regular saucepan and explore the features that set them apart. Here’s a comparison table highlighting the key differences:

Heavy Bottomed SaucepanRegular Saucepan
Heat DistributionProvides even heat distribution due to the thick and solid bottom.Heat distribution may be less even due to a thinner bottom.
Heat RetentionRetains heat effectively, allowing for thorough and consistent cooking.May not retain heat as well, leading to temperature fluctuations.
StabilityOffers stability during cooking, minimizing tipping or wobbling.May be less stable and prone to tipping or wobbling.
VersatilitySuitable for a wide range of cooking techniques, including simmering and delicate custards.Suitable for basic cooking tasks but may struggle with precise temperature control.
ConstructionTypically made of materials like stainless steel, copper, or aluminum.Often made with lighter materials and thinner bottoms.
DurabilityKnown for their sturdiness and durability, making them long-lasting.May be less durable, especially if made with thinner materials.
PriceCan range in price depending on the material and brand.Generally more affordable compared to heavy-bottomed saucepans.

These differences highlight why a heavy-bottomed saucepan is superior for many cooking needs. Its thicker base provides superior heat distribution, allowing for more precise and even cooking. A heavy-bottomed saucepan’s enhanced heat retention and stability improve cooking performance.

On the other hand, regular saucepans, while suitable for basic cooking tasks, may offer a different level of control and consistency. They may have thinner bottoms, leading to uneven heat distribution and reduced heat retention. Regular saucepans are often more affordable but may sacrifice some durability compared to heavy-bottomed saucepans.

Considering these distinctions, you can make an informed decision when selecting the suitable saucepan for your specific cooking requirements. Whether you opt for a heavy-bottomed saucepan or a regular saucepan, understanding their differences will help you achieve the best results in the kitchen.

Factors to Consider When Choosing a Heavy-Bottomed Saucepan

Factors to Consider when Choosing a Heavy-Bottomed Saucepan

When selecting a heavy-bottomed saucepan, several essential factors must be considered. Let’s explore these factors to help you make an informed decision:

Size of the Saucepan: 

Consider the size of the saucepan that will best suit your cooking needs. Heavy-bottomed saucepans come in various sizes, ranging from small to large. Think about the quantity of food you typically cook and the number of people you usually serve. It’s beneficial to have a range of sizes to accommodate different recipes and cooking tasks.

Type of Stove: 

Take into account the type of stove you have in your kitchen. Heavy-bottomed saucepans are compatible with most stovetop types, including gas, electric, and induction. However, if you have an induction cooktop, ensure that the saucepan is labeled explicitly as induction-compatible. This will guarantee optimal heat transfer and efficiency.

Cost: 

Consider your budget when choosing a heavy-bottomed saucepan. The cost can vary depending on the brand, material, and quality. Stainless steel saucepans are often more affordable, while copper or high-end brands can be more expensive. Determine your budget range and prioritize the features that are most important to you.

Maintenance: 

Evaluate the maintenance requirements of the saucepan. Some heavy-bottomed saucepans are dishwasher-safe, which can be convenient for easy cleaning. Others may require handwashing to preserve their quality and extend their lifespan. Additionally, consider if the saucepan requires specific care instructions, such as seasoning for cast iron pans. Choose a saucepan that aligns with your preferred cleaning and maintenance routine.

Purpose: 

Think about the specific purpose or cooking techniques you intend to use for the saucepan. Are you primarily using it for simmering sauces, boiling pasta, or preparing delicate custards? Different heavy-bottomed saucepans excel in specific tasks. 

For example, copper pans are excellent for tasks requiring precise temperature control, while stainless steel pans are versatile for various cooking techniques. Choose a saucepan that suits your specific cooking needs and preferences.

Considering these factors, you can select a heavy-bottomed saucepan that aligns with your cooking style, budget, and desired outcomes.

Benefits of Using a Heavy-Bottomed Saucepan

Using a heavy-bottomed saucepan in your kitchen can offer numerous advantages that enhance your cooking experience and the quality of your dishes. Let’s explore the benefits of using this versatile cookware:

Reduced Risk of Burning Food: 

One of the significant advantages of a heavy-bottomed saucepan is its superior heat distribution. The thick and solid base ensures even heat spread across the cooking surface, minimizing the risk of hot spots that can lead to burning or uneven cooking. This feature is particularly beneficial when preparing delicate sauces, custards, or dishes that require precise temperature control.

Versatility: 

Heavy-bottomed saucepans are incredibly versatile and can handle various cooking tasks. These pans can do everything from simmering sauces and boiling pasta to preparing soups, stews, and more. Whether you need to slow cook, sauté, or simmer, a heavy-bottomed saucepan provides reliable performance and consistent results.

Energy Efficiency: 

The excellent heat retention of heavy-bottomed saucepans contributes to their energy efficiency. Once the pan reaches the desired temperature, it requires less heat to maintain the cooking process. This means you can reduce the stove’s heat while cooking, saving energy and lowering utility bills.

Durability: 

Heavy-bottomed saucepans are built to last. The sturdy construction and high-quality materials, such as stainless steel, copper, or cast iron, ensure their durability and longevity. When properly cared for, these saucepans can serve you well for many years, making them a wise investment for any kitchen.

Health Benefits: 

Using a heavy-bottomed saucepan can also have health benefits. With even heat distribution and precise temperature control, you can avoid overcooking or scorching ingredients, which may preserve their nutrients and flavors. Some materials, such as stainless steel, are non-reactive, ensuring your food remains safe and free from harmful chemical interactions.

Tips for Using a Heavy Bottomed Saucepan

Tips for Using a Heavy Bottomed Saucepan

Using a heavy-bottomed saucepan effectively can elevate your cooking experience and help you achieve excellent results. Here are some tips to keep in mind when using this type of cookware:

Preheat the Pan: Before adding any ingredients, preheat the heavy-bottomed saucepan over medium heat for a few minutes. This ensures the pan is evenly heated and ready to distribute heat effectively once you start cooking. Preheating also helps prevent food from sticking to the surface.

Use Medium to Low Heat: Heavy-bottomed saucepans are designed to conduct and retain heat efficiently. It’s best to use medium to low heat settings on your stove to maximize its performance. Avoid high heat, as it may lead to scorching or burning food. The thick base of the saucepan will distribute heat evenly, even on lower heat settings.

Stir Occasionally: Heavy-bottomed saucepans provide excellent heat distribution, but stirring your food occasionally is still essential. This helps prevent ingredients from sticking to the bottom and promotes even cooking. Use a wooden or heat-resistant silicone spoon or spatula to stir gently and avoid scratching the surface.

Adjust Cooking Times: Due to the excellent heat retention of a heavy-bottomed saucepan, you may need to adjust your cooking times slightly. Once the pan reaches the desired temperature, it will continue to cook the food even when the heat is reduced or turned off. Keep this in mind and monitor your cooking closely to avoid overcooking.

Avoid Abrasive Cleaning: To maintain the quality of your heavy-bottomed saucepan, avoid using abrasive cleaning tools or harsh chemicals. Opt for gentle dishwashing liquid and a soft sponge or cloth for cleaning. If food is stuck on the bottom, fill the pan with warm water and let it soak before gently scrubbing.

Match Pan Size to Burner: When using a heavy-bottomed saucepan, match the pan’s size to the size of the burner on your stove. Using a too-small or too-large pan for the burner can result in uneven heat distribution and inefficient cooking.

Store Properly: Store your heavy-bottomed saucepan properly to prevent damage or scratches. Place a soft cloth or paper towel between multiple pans to protect the surfaces if stacking multiple pans. Store the pans in a dry and well-ventilated area to avoid moisture buildup.

By following these tips, you can make the most of your heavy-bottomed saucepan and enjoy its superior cooking performance. Proper use and care will make it a reliable and versatile tool in your kitchen, helping you easily create delicious meals.

Frequently Asked Questions

What is a heavy saucepan? 

A heavy saucepan is a type of cookware with a thick and solid bottom, which aids in even heat distribution and retention during cooking. It is designed to provide superior performance and precise temperature control.

What is a heavy pan called? 

A heavy pan with a thick bottom is often called a heavy-bottomed pan or a heavy-bottomed saucepan. The weight and construction of these pans contribute to their excellent heat distribution and retention capabilities.

Can I use a Heavy Bottomed Saucepan on an Induction Stove? 

Yes, many heavy-bottomed saucepans are compatible with induction stoves. However, ensuring that the saucepan is labeled explicitly as induction-compatible is essential. Induction stoves require cookware with a magnetic base to generate heat, and not all heavy-bottomed saucepans are designed for this purpose.

Can a Heavy Bottomed Saucepan be used in the Oven? 

Yes, depending on the handle material, many heavy-bottomed saucepans are oven-safe. However, it is essential to check the manufacturer’s instructions or specifications to determine the specific temperature limits and guidelines for oven use. Some heavy-bottomed saucepans have removable handles or handles designed to withstand oven temperatures.

Why Does a Heavy-Bottomed Saucepan Cost More than a Regular Saucepan?

A heavy-bottomed saucepan’s higher cost than a regular saucepan can be attributed to several factors. Firstly, heavy-bottomed saucepans are often constructed using high-quality materials such as stainless steel, copper, or cast iron, which are more expensive than lighter materials. Additionally, the extra thickness and weight of the bottom require different manufacturing processes, resulting in a higher production cost. Heavy-bottomed saucepans’ superior heat distribution, retention, and overall performance also contribute to their higher price point than regular saucepans.

Conclusion

A heavy-bottomed saucepan is a valuable addition to any kitchen. Its thick and solid bottom ensures even heat distribution and superior heat retention, reducing the risk of burning food and providing consistent cooking results. Heavy-bottomed saucepans offer numerous benefits for various cooking tasks with their versatility, energy efficiency, and durability. 

Consider size, stove compatibility, cost, maintenance, and purpose when choosing a suitable saucepan. You can make the most of this cookware and elevate your culinary creations by following proper usage tips and understanding the differences between heavy-bottomed and regular saucepans. Whether you’re simmering sauces, boiling pasta, or preparing delicate custards, a heavy-bottomed saucepan will be your reliable companion in the kitchen.

What Can Never Be Put in a Saucepan? (Answered 2023)

0

Welcome to our blog post, where we explore a rather intriguing question: “What can never be put in a saucepan?” The answer is the lid. But Cooking enthusiasts and curious minds alike have pondered this query, and today we are here to provide you with a definitive answer.

In this article, we will delve into culinary possibilities and limitations, uncovering the elusive item that defies the confines of a humble saucepan. So, let’s embark on this culinary adventure and discover what indeed cannot find its place within the confines of a saucepan.

The Basics of Saucepan Cooking

The Basics of Saucepan Cooking

When it comes to the art of cooking, the saucepan is a fundamental tool found in every kitchen. Its versatile nature and ability to handle various ingredients make it an indispensable companion for amateur and seasoned chefs. The saucepan’s design, typically featuring a long handle and a deep, rounded body with a lid, allows for even heat distribution and efficient cooking.

Saucepan cooking offers a multitude of culinary possibilities. This humble utensil can easily handle various tasks, from simmering soups and sauces to boiling pasta and grains. Its compact size makes it perfect for preparing small to medium-sized portions, making it an ideal choice for everyday cooking.

To harness the full potential of saucepan cooking, it is essential to understand some basic techniques. Please start by selecting the proper size saucepan for your needs, ensuring it is large enough to accommodate the ingredients without overcrowding. This allows for proper heat circulation and ensures even cooking throughout.

When cooking with a saucepan, it is essential to adjust the heat appropriately. Different recipes call for varying heat levels, ranging from low simmering to high boiling. Maintaining the desired temperature ensures that the flavors develop and the ingredients are cooked to perfection.

Another crucial aspect of saucepan cooking is proper stirring. Whether it’s stirring a delicate sauce to prevent lumps or ensuring that grains cook evenly, stirring plays a vital role in achieving consistent results. Use a wooden spoon or a heat-resistant utensil to stir the contents, distributing heat and flavors evenly and gently.

As you become more familiar with saucepan cooking, you’ll discover the joy of experimenting with different ingredients and flavors. From creating flavorful stews and hearty risottos to crafting delectable desserts, the saucepan becomes a canvas for culinary creativity.

Now that we’ve covered the basics of saucepan cooking, it’s time to explore the intriguing question: “What can never be put in a saucepan?” Let’s dive deeper into this culinary mystery and uncover the answer together.

Food That Shouldn’t Be Cooked in a Saucepan

While the saucepan is a versatile cooking vessel, certain types of food are not suitable for preparation within its confines. Understanding these limitations is essential to avoid culinary mishaps and ensure the best results in your cooking endeavors.

Deep-Fried Delights: 

Deep-frying is a cooking method that involves immersing food in hot oil to achieve a crispy exterior. While saucepans can handle some shallow frying, they are designed for something other than deep-frying due to their limited capacity and potential oil splatter hazards. It is best to utilize a dedicated deep fryer or a deep, wide pot with high sides for deep-frying purposes.

Grilled Goodness: 

Grilling imparts a distinct smoky flavor to food and creates enticing grill marks. Unfortunately, a saucepan cannot replicate the direct heat and open flame required for authentic grilling. For that unmistakable smoky taste and appealing charred texture, it is advisable to use a grill or a stovetop grill pan instead.

Baking Wonders: 

Baking involves using dry heat in an enclosed space, such as an oven, to transform ingredients into mouthwatering treats. While a saucepan can handle stovetop baking techniques like bread pudding or custards, there are better options for traditional oven baking. It’s best to rely on a proper baking dish or sheet pans for cakes, cookies, and other oven-baked delights.

Roasting Excellence: 

Roasting entails cooking food at high temperatures in an open pan to achieve a caramelized exterior and tender interior. While a saucepan can be used for roasting applications, such as roasting vegetables or minor cuts of meat, larger roasts or whole poultry are better suited for roasting pans or baking dishes that provide ample space and allow for even browning.

Barbecue Bliss: 

Barbecuing is a beloved cooking method that involves slow-cooking meat over low, indirect heat, often accompanied by smoky wood chips. Achieving authentic barbecue flavors and tenderness requires specialized equipment like smokers or outdoor grills, which are beyond the capabilities of a saucepan.

Remember, the saucepan has its strengths, but it’s essential to recognize its limitations regarding specific cooking techniques. By choosing the appropriate cookware for each culinary adventure, you’ll be able to bring out the best in your dishes and explore a world of delectable flavors.

Ingredients That Shouldn’t Be Put in a Saucepan

While the saucepan is a versatile tool in the kitchen, certain ingredients are not suitable for cooking within its confines. Understanding these limitations can prevent undesirable outcomes and help you maximize your culinary endeavors. Let’s explore some ingredients that are best avoided in saucepan cooking.

Delicate Herbs and Spices: 

Fragile herbs like basil, cilantro, and parsley and delicate spices like saffron are better suited for adding freshness and flavor to dishes as finishing touches. Their delicate aromas and vibrant colors can diminish when subjected to prolonged heat in a saucepan. It’s best to incorporate these ingredients towards the end of the cooking process to preserve their qualities.

Highly Fragile Seafood: 

Delicate seafood varieties such as scallops, tender fish fillets, and lobster require gentle cooking methods to maintain their tender texture. The intense heat and vigorous stirring associated with saucepan cooking can lead to overcooking and toughness. Opt for more delicate cooking techniques like steaming, baking, or pan-searing for these seafood delicacies.

Quick-Cooking Greens: 

Leafy greens like spinach, kale, and Swiss chard cook rapidly due to their high water content. While a saucepan can accommodate these greens, it’s crucial to be mindful of their cooking time. Overcooking them can result in losing vibrant color, texture, and essential nutrients. A brief blanching or sautéing in a skillet may be more suitable to retain their freshness.

Highly Acidic Ingredients: 

Certain acidic ingredients, such as citrus juices, vinegar, and wine, can react with metals commonly found in saucepans, such as aluminum or copper. This chemical reaction can lead to an unpleasant metallic taste and discoloration. To prevent such reactions, using non-reactive cookware like stainless steel or enamel-coated pans is advisable when working with highly acidic ingredients.

Delicate Dairy Products: 

While saucepans can handle dairy-based ingredients like milk, cream, or cheese in many recipes, care must be taken to prevent scorching or curdling. To avoid these issues, it’s recommended to heat dairy products over low to medium heat, stirring frequently and ensuring they do not reach a boiling point. For recipes that require precise temperature control, a double boiler or a specialized dairy pot may be more suitable.

By understanding the limitations of a saucepan and choosing alternative cooking methods when necessary, you can ensure the best results for your dishes and preserve the delicate flavors and textures of certain ingredients.

Other Cooking Methods to Consider

Other Cooking Methods to Consider

While saucepans are an indispensable tool in the kitchen, it’s worth exploring alternative cooking methods that offer unique flavors, textures, and culinary experiences. By venturing beyond the confines of the saucepan, you can expand your repertoire and create dishes that truly captivate the senses. Let’s explore other cooking methods you may consider incorporating into your culinary adventures.

Grilling 

Grilling is a popular outdoor cooking method that infuses food with a distinct smoky flavor and tantalizing grill marks. Whether you prefer a charcoal grill or a gas grill, this method imparts a unique charred taste and a delightful texture to meats, vegetables, and fruits. Grilling allows for direct heat and open-flame cooking, creating a wonderful caramelization that cannot be replicated in a saucepan.

Baking

Baking involves cooking food in an enclosed space using dry heat, such as an oven. This method is ideal for creating baked goods like bread, cakes, cookies, and pastries. The even heat distribution in an oven helps ingredients rise, develop a golden crust, and achieve a tender, moist interior. Baking opens up a world of sweet and savory possibilities beyond the capabilities of a saucepan.

Roasting

Roasting is a technique that involves cooking food at high temperatures in an open pan, typically in the oven. This method is perfect for bringing out the natural flavors and textures of vegetables, meats, and poultry. Roasting allows caramelization and creates a deliciously crispy exterior while maintaining a juicy and tender interior. It’s an excellent choice for creating hearty and flavorful dishes.

Slow Cooking

Slow cooking, often done in a slow cooker or a Dutch oven, involves cooking food at low temperatures for an extended period. This method is ideal for tough cuts of meat, stews, and soups, as the slow and gentle heat breaks down collagen and transforms the ingredients into melt-in-your-mouth goodness. Slow cooking melds flavors, creating rich, savory, and comforting dishes.

Sous Vide

Sous vide involves cooking food in a vacuum-sealed bag submerged in a controlled water bath. This method ensures precise temperature control and even cooking throughout. Sous vide cooking produces tender and evenly cooked meats, vegetables, and desserts. While it may require specialized equipment, the results are often restaurant-quality and impressive.

Incorporating these alternative cooking methods into your culinary repertoire allows you to elevate your dishes and explore various flavors and textures. While the saucepan remains a reliable kitchen staple, experimenting with different techniques will allow you to unleash your creativity and create memorable meals.

Creative Ways to Use a Saucepan

While the saucepan is a versatile tool for everyday cooking, there are also creative ways to utilize this humble kitchen utensil beyond its conventional uses. With a bit of imagination and ingenuity, you can unlock the full potential of a saucepan and explore new culinary adventures. Here are some creative ways to make the most of your saucepan:

Infused Syrups and Simple Syrups: 

Use your saucepan to create flavorful infused or simple syrups that elevate beverages and desserts. Combine water, sugar, and your choice of flavorings, such as herbs, fruits, or spices, in the saucepan. Heat gently until the sugar dissolves and the flavors infuse into the syrup. Strain and cool before using in cocktails, mocktails, or drizzling over cakes and pancakes.

Homemade Jam or Preserves: 

Turn your saucepan into a mini jam-making station. Cook down fresh fruits, sugar, and a squeeze of lemon juice in the saucepan until thick and jam-like. The saucepan’s wide surface area promotes evaporation and helps concentrate the flavors. Enjoy your homemade jam on toast, in yogurt, or as a sweet accompaniment to cheese.

Popcorn Popping: 

Give your movie nights a homemade touch by using your saucepan to pop popcorn. Place the saucepan on the stovetop, add oil and popcorn kernels, cover with a lid, and gently shake the pan as the kernels pop. It’s a fun and economical way to enjoy freshly popped popcorn seasoned with your favorite spices or melted butter.

Steaming Vegetables: 

While steaming may not be an unconventional use for a saucepan, it’s worth mentioning for its simplicity and health benefits. You can transform your saucepan into a versatile steamer with an insert or collapsible basket. Place water in the bottom of the saucepan, add the steamer insert and arrange the vegetables on top. Cover and steam until tender-crisp for a nutritious and flavorful side dish.

Double Boiler Setup: 

Create a makeshift double boiler by using your saucepan and a heatproof bowl. Fill the saucepan with a few inches of water and place it over low heat. Set the heatproof bowl on top of the saucepan, ensuring it fits snugly. This setup is perfect for melting chocolate, gently heating delicate sauces, or preparing temperature-sensitive dishes like hollandaise.

DIY Facial or Hair Steam: 

Transform your saucepan into a mini spa for facial or hair steaming. Fill the saucepan with water and heat until it produces steam. Remove from the heat and position your face or towel over your head to capture the steam. The steam opens up pores and can help to relax and rejuvenate your skin or provide a hydrating treatment for your hair.

Tips for Saucepan Cooking Success

Mastering the art of saucepan cooking can elevate your culinary skills and bring delicious dishes to your table. To ensure your saucepan cooking endeavors are successful, here are some valuable tips to keep in mind:

Choose the Right Size: Select a saucepan that matches the quantity of food you’re preparing. Using a saucepan that is too large can lead to uneven heat distribution, while using one that is too small may cause ingredients to overcrowd and not cook properly.

Use the Right Heat: Adjust the heat according to the recipe requirements. High heat is ideal for boiling water or quickly searing ingredients, while low to medium heat is suitable for simmering sauces, delicate ingredients, and slow-cooking dishes. Controlling the heat level ensures even cooking and prevents burning or scorching.

Stir Regularly: Stirring your ingredients regularly promotes even heat distribution and prevents sticking or burning. Use a wooden or heat-resistant spatula to gently stir and scrape the bottom and sides of the saucepan to prevent any food from sticking or forming a crust.

Add Ingredients in Stages: When preparing dishes with multiple ingredients, add them in stages based on their required cooking times. Start with ingredients that take longer to cook and gradually add those that require less time. This ensures all components are perfectly cooked without overcooking or undercooking any element.

Season Thoughtfully: Season your dishes with salt and spices throughout the cooking process. This allows the flavors to develop and meld together. It’s better to start with a light hand and adjust the seasoning later, as adding more is more accessible than removing excess salt or spices.

Use a Lid When Needed: Covering the saucepan with a lid helps retain heat, speed up cooking time, and keep moisture locked in. Use the lid when you want to bring liquids to a boil quickly, when simmering sauces or stews, or when cooking rice and grains to achieve fluffy results.

Taste and Adjust: Regularly taste your food as it cooks. This allows you to adjust the seasonings, flavors, and consistency. Remember, the recipe serves as a guide, and your taste buds are the ultimate judges of deliciousness.

Practice Patience: Some dishes require patience, especially when braising or simmering. Allowing enough time for flavors to develop and ingredients to tenderize can significantly affect the outcome. Embrace the process and resist the temptation to rush through cooking times.

Clean with Care: After cooking, clean your saucepan thoroughly with warm soapy water and a soft sponge. Avoid using abrasive cleaners or harsh scrubbing tools that can damage the pan’s surface. Proper cleaning and maintenance will prolong the lifespan of your saucepan.

Following these tips enhance your saucepan cooking skills and easily creates delightful dishes.

Common Saucepan Mistakes and How to Avoid Them

Common Saucepan Mistakes and How to Avoid Them

Saucepan cooking can be a delightful experience, but it has its pitfalls. To help you avoid some common mistakes and achieve culinary success, here are some tips to keep in mind:

Overcooking or Undercooking: One of the most common mistakes in saucepan cooking is misjudging cooking times, leading to overcooked or undercooked food. To avoid this, carefully follow recipe instructions and use timers as needed. Keep an eye on the food while it cooks and tests for doneness with a fork or thermometer, depending on the food you’re preparing.

Burning or Scorching: Burnt or scorched food ruins the taste and can be challenging to clean from the saucepan. To prevent burning, use medium to low heat for most cooking tasks and adjust as needed. Stir regularly to distribute heat evenly, and avoid leaving food unattended on high heat. If you notice food sticking to the bottom, reduce the heat and add a little liquid to loosen it.

Uneven Cooking: Uneven cooking can occur when heat isn’t distributed evenly across the saucepan. To promote even cooking, ensure the saucepan is centered correctly on the burner and fully contacts the heating element. Stir the food regularly and adjust the heat to maintain a consistent temperature throughout the cooking process.

Using the Wrong Type of Saucepan: Using the wrong saucepan for a particular cooking task can lead to subpar results. Consider the material and size of the saucepan for the recipe requirements. For example, acidic ingredients like tomatoes may react with reactive metals, such as aluminum or copper, so using non-reactive stainless steel or enamel-coated saucepans for such dishes is best.

Lack of Liquid: Insufficient liquid in the saucepan can result in food sticking to the bottom or burning. Ensure enough liquid covers the ingredients, especially when simmering or braising. If necessary, add more liquid during cooking to maintain the desired consistency and prevent the food from drying out.

Neglecting to Preheat: Preheating the saucepan before adding ingredients is essential for achieving proper cooking temperatures and preventing food from sticking. Preheat the saucepan over medium heat for a few minutes before adding oil or other ingredients. This helps create a non-stick surface and allows for even cooking.

Crowding the Saucepan: Overcrowding the saucepan with fewer ingredients can lead to uneven cooking and prevent proper heat distribution. Give the ingredients enough space to cook evenly and allow steam to escape. If necessary, cook in batches or use a larger saucepan to accommodate the ingredients comfortably.

Neglecting to Adjust Seasonings: Saucepans tend to concentrate flavors as liquids reduce during cooking. It’s important to taste and adjust seasonings throughout the cooking process. Add salt, spices, or other seasonings in small increments, tasting and adjusting until the flavors are balanced and to your liking.

Conclusion

Saucepan cooking is a fundamental skill that opens up culinary possibilities. By understanding the basics, avoiding common mistakes, and exploring alternative cooking methods, you can unleash your creativity and create delicious dishes that tantalize the taste buds. Remember to choose the right size saucepan, adjust heat levels accordingly, stir regularly, and add ingredients in stages. 

Additionally, be aware of the limitations of a saucepan and explore other cooking methods like grilling, baking, roasting, slow cooking, and sous vide for a diverse culinary experience. These tips allow you to embark on a flavorful and enjoyable saucepan cooking journey. Happy cooking!

FAQs

What can be put in a saucepan?

A versatile saucepan can cook various ingredients, such as soups, sauces, pasta, grains, vegetables, and more. It is ideal for tasks that require gentle simmering, boiling, or reheating.

What is the best type of saucepan for cooking?

The best type of saucepan for cooking depends on personal preference and cooking needs. Stainless steel saucepans are famous for their durability and even heat distribution. Non-stick saucepans are convenient for cooking tasks requiring minimal oil or easy cleanup. Copper saucepans offer excellent heat conductivity but require more maintenance.

Can I use a saucepan on the grill?

Using a saucepan directly on a grill is not recommended, as it may damage the handle or warp the pan due to direct exposure to high heat. However, you can use a heat-resistant skillet or a grill pan designed for grilling.

How do I know if my saucepan is oven-safe?

Check the manufacturer’s instructions or the packaging of your saucepan to determine if it is oven-safe. Some saucepans are oven-safe to a specific temperature, while others may not be suitable for oven use. Look for specific markings or symbols indicating oven compatibility.

What is the best way to clean a saucepan?

To clean a saucepan, fill it with warm soapy water and let it soak for a while. Use a soft sponge or cloth to scrub away any food residue gently. For stubborn stains or burnt-on food, you can create a paste using baking soda and water and apply it to the affected areas. Avoid using abrasive cleaners or metal scouring pads that may damage the surface of the saucepan.

Can You Fry Chicken in an Aluminum Pan? (Explained 2023)

When cooking fried chicken, the choice of cookware plays a significant role in achieving that perfect crispy and flavorful result. Is an aluminum pan suitable among the various options available? This article will explore the question: Can you fry chicken in an aluminum pan? 

We will delve into the benefits and drawbacks of using aluminum pans for frying chicken and provide insights and recommendations for a delicious and safe cooking experience. So, let’s dive in and find out if aluminum pans are a good fit for frying chicken!

Understanding Frying Chicken

Understanding Frying Chicken

Frying chicken is a popular cooking method that results in deliciously crispy and flavorful chicken pieces. This cooking technique immerses the chicken in hot oil, allowing it to cook to golden-brown perfection. Before we delve into the details of frying chicken in an aluminum pan, let’s explore the basics of this mouthwatering culinary process.

Chicken frying, also known as deep-frying, is a process where pieces of chicken are submerged in hot oil, typically at temperatures between 350°F to 375°F (175°C to 190°C). The high heat quickly cooks the chicken, creating a crispy outer crust while sealing in the juices, resulting in tender and succulent meat inside. The key to achieving the perfect fried chicken is maintaining the oil temperature and using the right cookware.

Types of Chicken Frying

There are two standard methods of frying chicken: pan-frying and deep-frying. Pan-frying involves cooking chicken pieces in shallow oil in a skillet or frying pan. While this method can produce tasty results, it may not evenly cook more significant chicken pieces, and constant flipping and turning are required.

On the other hand, deep-frying provides a more consistent and even cooking process. Deep-frying requires submerging the chicken pieces entirely in hot oil, ensuring that each piece is uniformly cooked. This method is ideal for achieving that classic crispy texture and even browning across all the chicken pieces.

Importance of Choosing the Right Pan

The choice of pan plays a crucial role in the success of frying chicken. The right pan should offer excellent heat conductivity and even heat distribution to ensure the chicken cooks uniformly. Additionally, the pan should have enough capacity to accommodate the desired quantity of chicken without overcrowding, which can lead to uneven cooking.

Here, the aluminum pan comes into the picture. As mentioned earlier, aluminum pans are excellent heat conductors, making them well-suited for frying chicken. The even distribution of heat across the pan’s surface helps prevent hot spots and ensures that each piece of chicken receives consistent cooking.

However, while aluminum pans offer advantages in terms of heat conductivity and affordability, it’s essential to be mindful of specific considerations, such as the potential reaction with acidic ingredients. If you plan to use acidic marinades or seasonings for your fried chicken, opt for pans with non-reactive coatings or consider other cookware options like stainless steel or cast iron.

Can You Fry Chicken in an Aluminum Pan

Aluminum pans are a popular choice for cooking, but can they effectively fry chicken? Let’s explore the factors related to heat distribution and food safety when using aluminum pans for frying chicken.

Aluminum Pans and Heat Distribution: Aluminum pans are known for their excellent heat conductivity. They heat up quickly and distribute heat evenly, crucial for achieving crispy and evenly cooked fried chicken. The aluminum material allows for efficient heat transfer, helping to cook the chicken thoroughly and promote a golden-brown crust.

Aluminum Pans and Food Safety: When it comes to food safety, there are some considerations to consider when frying chicken in an aluminum pan. One potential concern is the leaching of aluminum into food. 

While aluminum pans are generally considered safe, acidic ingredients and prolonged cooking times can increase the risk of aluminum leaching. To minimize this risk, limiting the use of acidic marinades or avoiding storing acidic dishes in the pan for extended periods is advisable.

Additionally, some individuals may be concerned about aluminum consumption’s potential health effects. While the amount of aluminum that leaches into food is typically minimal, avoiding using aluminum pans with damaged or scratched surfaces is recommended, as these may increase the likelihood of aluminum leaching. Alternative cookware materials like stainless steel or cast iron may be suitable if you have specific health concerns.

How to Fry Chicken in an Aluminum Pan

Frying chicken in an aluminum pan is straightforward and can yield delicious results. Here is a step-by-step guide to help you fry chicken to perfection using an aluminum pan:

Step 1: Choose the Right Chicken Pieces. Start by selecting the chicken pieces you want to fry. You can use bone-in or boneless chicken thighs, drumsticks, wings, or breast pieces, according to your preference. Ensure the chicken is cleaned correctly, and pat it dry with a paper towel to remove excess moisture.

Step 2: Season the Chicken Season the chicken pieces with your preferred spices and herbs. You can use a combination of salt, pepper, paprika, garlic powder, or any other seasonings that suit your taste. Make sure to coat the chicken evenly on all sides for maximum flavor.

Step 3: Preheat the Aluminum Pan Place your aluminum pan on the stovetop and preheat it over medium-high heat. Allow the pan to become hot before adding the oil. Preheating the pan ensures the chicken cooks evenly and develops a crispy crust.

Step 4: Add Oil Once the pan is hot, add enough oil to create a depth of about half an inch. It’s recommended to use oils with high smoke points, such as vegetable or peanut oil, as they can withstand the heat required for frying without breaking down or imparting unwanted flavors.

Step 5: Heat the Oil Heat the oil until it reaches the ideal frying temperature, which is around 350°F to 375°F (175°C to 190°C). To ensure accuracy, you can use a deep-fry or candy thermometer to monitor the oil temperature throughout the frying process.

Step 6: Carefully Place the Chicken in the Pan Gently place the seasoned chicken pieces into the hot oil, one at a time, using tongs or a slotted spoon. Be cautious to avoid any oil splatters. Arrange the chicken in a single layer, leaving enough space between each piece for even cooking. It’s essential not to overcrowd the pan, as it can lower the oil temperature and result in soggy chicken.

Step 7: Fry the Chicken. Allow the chicken to fry undisturbed for a few minutes on one side until it turns golden brown. Then, flip the chicken pieces using tongs or a spatula to ensure even browning on the other side. Continue frying until the chicken reaches an internal temperature of 165°F (74°C) and achieves a crisp, golden-brown exterior.

Step 8: Drain and Rest Once the chicken is cooked, carefully remove it from the pan with tongs or a slotted spoon. Place the fried chicken on a wire rack or paper towels to drain excess oil. Allowing the chicken to rest for a few minutes before serving helps retain its juiciness and makes the crust even crispier.

Step 9: Serve and Enjoy. Serve your deliciously fried chicken hot and enjoy it as it is or with your favorite dipping sauces or side dishes. The chicken’s crispy exterior and tender interior will surely delight your taste buds.

Following these simple steps, you can achieve a delectable batch of fried chicken using an aluminum pan. Remember to exercise caution while handling hot oil and always prioritize safety in the kitchen. 

Factors to Consider Before Frying Chicken in an Aluminum Pan

Factors to Consider Before Frying Chicken in an Aluminum Pan

Before diving into frying chicken in an aluminum pan, there are a few essential factors to consider. These factors can significantly impact the outcome of your fried chicken, ensuring that it turns out delicious and perfectly cooked. Let’s explore these factors in detail:

Type of Aluminum Pan: 

Not all aluminum pans are created equal. When choosing an aluminum pan for frying chicken, consider the thickness and quality of the pan. Thicker pans distribute heat more evenly and are less prone to warping. Look for pans with sturdy construction and a flat bottom to ensure optimal heat distribution.

Type of Chicken: 

Different cuts of chicken require varying cooking times and techniques. Bone-in chicken pieces, such as thighs and drumsticks, generally take longer to cook than boneless chicken breasts or wings. Consider the size and thickness of the chicken pieces to determine the appropriate frying time. Thicker cuts may require lower heat or more prolonged cooking to ensure the chicken is fully cooked.

Type of Frying Method: 

There are various frying methods, such as pan-frying or deep-frying. Pan-frying involves cooking the chicken in a shallow amount of oil, while deep-frying requires submerging the chicken pieces entirely in hot oil. The choice of method depends on personal preference, desired texture, and the type of pan you’re using. Aluminum pans are well-suited for pan-frying and deep-frying, providing versatility in cooking options.

Seasoning and Coating: 

Seasoning and coating the chicken before frying add flavor and texture to the final dish. Consider the spices, herbs, or marinades you want to use to enhance the taste of your fried chicken. Coatings like flour, breadcrumbs, or batter can also create a crispy crust. Ensure the seasoning and coating are evenly applied to each piece for consistent flavor and texture.

Considering these factors, you can make informed decisions when frying chicken in an aluminum pan. Experimenting with different combinations of pan, chicken type, frying method, and seasonings allows you to create a customized fried chicken experience that suits your preferences. Enjoy the process and savor the delicious results of your culinary exploration!

Best Practices for Frying Chicken in an Aluminum Pan

To ensure successful and flavorful results when frying chicken in an aluminum pan, it’s essential to follow some best practices. These practices will help you achieve crispy, evenly cooked chicken every time. Let’s explore these best practices step by step:

Preheating the Pan: 

Before adding the oil, preheat the aluminum pan over medium-high heat. Preheating allows the pan to distribute heat evenly and ensures that the chicken cooks uniformly. A hot pan helps create a crispy exterior while sealing in the juices, resulting in tender and flavorful chicken.

Choosing the Right Oil: 

Selecting the right oil is crucial for frying chicken. Oils with high smoke points, such as vegetables, peanuts, or canola, are ideal for frying at high temperatures. These oils can withstand the heat without breaking down or imparting undesirable flavors to the chicken. Avoid oils with low smoke points, such as olive oil, as they can smoke and burn at the frying temperatures required.

Maintaining the Right Temperature: 

Maintaining the proper frying temperature is essential for achieving crispy and evenly cooked chicken. The ideal temperature range for frying chicken in an aluminum pan is between 350°F to 375°F (175°C to 190°C). Use a deep-fry or candy thermometer to monitor the oil temperature throughout frying. Adjust the heat as needed to maintain the desired temperature.

Turning the Chicken: 

While frying, turning the chicken pieces is crucial to ensure even browning on all sides. Use tongs or a spatula to flip the chicken gently once one side turns golden brown. This flipping process allows the other side to cook and develop a crispy crust. Avoid flipping the chicken too frequently, leading to excess oil absorption and less crispy results.

How Long to Cook the Chicken: 

The cooking time for fried chicken depends on several factors, including the size and thickness of the chicken pieces. On average, bone-in chicken pieces may take around 12 to 15 minutes per side, while boneless chicken breasts or wings may cook faster, around 8 to 10 minutes per side. 

However, relying on the internal temperature rather than time alone is crucial. Ensure that the internal temperature of the chicken reaches 165°F (74°C) to ensure it’s fully cooked and safe to consume.

Following these best practices, you can achieve perfectly fried chicken in an aluminum pan. Remember to exercise caution when handling hot oil and always prioritize safety in the kitchen. Enjoy the crispy and flavorful results of your homemade fried chicken masterpiece!

Risks of Frying Chicken in an Aluminum Pan

Risks of Frying Chicken in an Aluminum Pan

While frying chicken in an aluminum pan can yield delicious results, there are some potential risks. Understanding these risks can help you take the necessary precautions and ensure a safe and enjoyable cooking experience. Let’s explore the risks associated with frying chicken in an aluminum pan:

Aluminum Leaching: 

Aluminum is a reactive metal, and prolonged exposure to certain ingredients, particularly acidic ones, can cause it to leach into cooked food. Acidic marinades, sauces, or seasonings containing vinegar, citrus juices, or tomatoes can accelerate this leaching process. Consuming excessive amounts of aluminum can harm health, so minimizing the contact between acidic ingredients and the aluminum pan is essential.

To mitigate this risk, consider using non-reactive cookware, such as stainless steel or cast iron pans when marinating or cooking with acidic ingredients. If you use an aluminum pan, limit the exposure time to acidic foods and avoid storing acidic dishes in the pan for extended periods.

Overheating and Warping: 

Aluminum pans are generally more prone to overheating and warping than other materials like stainless steel or cast iron. Subjecting an aluminum pan to extremely high heat or sudden temperature changes can cause it to warp or become misshapen, affecting its performance and longevity.

Avoid setting the stove’s heat to the maximum when frying chicken in an aluminum pan to prevent overheating and warping. Instead, use medium-high heat to achieve the desired frying temperature. Additionally, allow the pan to cool gradually after use, avoiding placing it under cold running water immediately.

Sticking and Burning: 

Aluminum pans may not be as naturally non-stick as those with specialized coatings. The chicken pieces or coating might stick to the pan’s surface when frying chicken, leading to uneven browning and potential burning.

To reduce sticking, ensure the pan is adequately preheated, and the oil is hot before adding the chicken. Also, avoid overcrowding the pan, leading to steam build-up and hindering the crispy texture. A non-stick spray or a small amount of cooking oil can also help minimize sticking.

While frying chicken in an aluminum pan can be a convenient and budget-friendly option, it’s crucial to be mindful of the potential risks associated with this cookware material. Taking appropriate precautions, such as using non-reactive pans for acidic ingredients and maintaining proper frying practices, can help you enjoy delicious and safe fried chicken.

Conclusion

Frying chicken in an aluminum pan can be satisfying and flavorful. You can achieve deliciously crispy fried chicken by following the proper steps, considering important factors, and adhering to best practices. However, it’s crucial to be aware of the potential risks, such as aluminum leaching and overheating. 

Taking precautions, like using non-reactive cookware for acidic ingredients and avoiding high heat, can help mitigate these risks. With proper care and attention, you can enjoy the mouthwatering results of frying chicken in an aluminum pan, creating a delectable meal for yourself and your loved ones.

FAQs

Is it safe to fry chicken in an aluminum pan? 

Yes, it is generally safe to fry chicken in an aluminum pan. However, there are some risks associated with aluminum pans, such as aluminum leaching and overheating. To minimize these risks, it’s essential to follow best practices, avoid prolonged exposure to acidic ingredients, and prevent overheating or warping of the pan.

What types of aluminum pans are best for frying chicken? 

When choosing an aluminum pan for frying chicken, opt for pans with a sturdy construction and a flat bottom. Thicker pans distribute heat more evenly and are less prone to warping. Look for pans with a non-stick coating, or use non-reactive cookware, such as stainless steel or cast iron, for acidic marinades or sauces.

Can you cook chicken in an aluminum pan? 

Yes, you can cook chicken in an aluminum pan. Aluminum pans suit various cooking methods, including frying, sautéing, and baking. However, it’s essential to be mindful of the risks associated with aluminum, such as aluminum leaching and sticking. Take proper precautions and follow recommended guidelines for safe and successful cooking.

How long does it take to cook chicken in an aluminum pan? 

The cooking time for chicken in an aluminum pan depends on various factors, including the size and thickness of the chicken pieces. On average, bone-in chicken pieces may take around 12 to 15 minutes per side, while boneless chicken breasts or wings may cook faster, around 8 to 10 minutes per side. However, always rely on the internal temperature of the chicken, which should reach 165°F (74°C), to ensure it’s fully cooked.

Is aluminum cookware safe for my health? 

Aluminum cookware is generally considered safe for regular use. However, excessive consumption of aluminum can be harmful to health. Avoid cooking acidic dishes or ingredients for extended periods in aluminum pans to minimize the risk of aluminum leaching into food. If you have concerns about aluminum exposure, consider using alternative cookware materials like stainless steel or cast iron.

Best Substitute for Loaf Pan | The Ultimate Guide 2023

Are you an enthusiastic baker eager to whip up some delicious homemade bread but without a loaf pan? Fear not! In this ultimate guide, we will explore the best substitute for loaf pan, allowing you to continue baking your favorite bread recipes without a hitch. 

Whether you’re looking for a quick fix or a creative alternative, we’ve got you covered. Say goodbye to the limitations of kitchen equipment and embrace the versatility of these alternatives that can easily fit into your baking adventures. Let’s dive in and discover the perfect solutions for your loaf pan woes!

What is Loaf Pan

A loaf pan, a bread pan, or a baking tin is a kitchen utensil designed explicitly for baking bread. It is typically rectangular, with straight sides and a flat bottom, providing the perfect structure for baking bread loaves. Loaf pans are commonly made from materials like aluminum, stainless steel, or non-stick coatings, which help in even heat distribution and prevent the bread from sticking to the pan.

The primary purpose of a loaf pan is to shape the dough into a specific form while baking, resulting in a well-defined loaf with evenly browned sides and a soft interior. The dimensions of a standard loaf pan can vary, but most commonly, it measures around 9 inches long, 5 inches wide, and 3 inches deep.

Loaf pans are not limited to bread-making alone; they can also be used for baking cakes, meatloaf, and other recipes requiring a uniform shape and uniform heat distribution. The structure provided by a loaf pan ensures that the baked goods maintain their shape and cook evenly, allowing for a delightful culinary experience.

Now that we understand what a loaf pan is and its purpose let’s explore some fantastic alternatives that can come to your rescue when you find yourself without a loaf pan.

Common Loaf Pan Substitutes

Common Loaf Pan Substitutes

When you don’t have a loaf pan at hand, don’t worry! There are several alternatives you can use to bake your favorite bread recipes. Let’s take a look at some common substitutes that can save the day:

Baking Sheet or Cookie Sheet

A baking or cookie sheet can be a versatile substitute for a loaf pan. Shape your dough into a loaf shape and place it on the baking sheet. Line it with parchment paper or grease it lightly to prevent sticking. The lack of sides in a baking sheet allows for a slightly different shape, but you’ll still achieve a deliciously baked bread.

Casserole Dish

Usually rectangular or square, a casserole dish can be an excellent alternative to a loaf pan. It offers similar dimensions and depth, providing the structure needed to bake a loaf of bread. Grease the dish or use parchment paper to ensure easy removal of the bread once baked.

Muffin Tin

While typically used for making muffins and cupcakes, a muffin tin can also be repurposed to create mini loaves. Divide your bread dough into smaller portions and shape each into the muffin cups. This option is perfect for portion control or when you want to experiment with different flavors or fillings.

Bundt Pan

Although primarily used for making beautifully shaped cakes, a Bundt pan can substitute for a loaf pan. The center tube in a Bundt pan helps with even heat distribution, resulting in well-cooked bread. Remember that the pan’s decorative shape may give your bread an exciting twist.

Pie Dish 

A round or rectangular pie dish can conveniently substitute a loaf pan. Its shallow depth may alter the shape of the bread slightly, but it will still provide a platform for baking delicious bread. Grease the dish or use parchment paper to ensure easy removal once the bread is baked.

With these ordinary loaf pan substitutes, you can confidently embark on your baking adventures, even when a loaf pan is not readily available. Embrace creativity and adaptability in your kitchen as you continue to enjoy the wonders of homemade bread.

Other Unconventional Substitutes

If you’re feeling adventurous and want to explore even more unconventional substitutes for a loaf pan, here are some unique options to consider:

Mason Jars

Mason jars can be an exciting substitute for individual-sized bread loaves. Layer the ingredients in the jar, leaving enough space for the dough to rise. Seal the jar with a lid and bake it directly in the oven. The result is a charming, portable loaf with a rustic touch.

Coffee Cans

Clean, empty coffee cans can be repurposed as makeshift loaf pans. Grease the inside of the can, pour in the bread dough, and place it in the oven. The cylindrical shape of the can will give your bread a distinct look reminiscent of traditional baked goods.

Clay Pots

Clay pots, often used for cooking stews or roasting, can be an alternative to a loaf pan. Make sure the pot is oven-safe and unglazed. Grease the pot or line it with parchment paper, then shape the dough and place it inside. The clay pot adds a unique flavor and texture to the bread.

Aluminum Foil

You can use aluminum foil to fashion a makeshift loaf pan in a pinch. Fold and shape the foil into a rectangular form, ensuring it is sturdy enough to hold the dough. Remember to grease the foil or use parchment paper to prevent the bread from sticking.

Paper Bags

Surprisingly, paper bags can be used to bake bread. Shape the dough into a loaf, place it in a greased paper bag, and fold the opening tightly to secure it. Put the bag on a baking sheet and bake it in the oven. The bag helps trap moisture, producing soft, moist bread with a slightly crunchy crust.

While these unconventional substitutes may deviate from traditional loaf pans, they offer exciting possibilities for your baking experiments. Embrace the unexpected and let your creativity soar as you explore unique alternatives in your quest for the perfect loaf of bread.

How to Choose the Right Substitute

When selecting a substitute for a loaf pan, it’s essential to consider a few factors to ensure the best results. Here are some guidelines to help you choose the correct alternative:

Size and Shape: 

Consider the dimensions and shape of the original loaf pan called for in your recipe. Look for a substitute that closely matches these measurements to maintain the intended volume and texture of the bread. While the shape may vary slightly with specific alternatives, aim for a similar size to ensure even baking.

Material: 

Different materials conduct heat differently, which can affect the baking process. Loaf pans are made of aluminum, stainless steel, or coated non-stick surfaces. When choosing a substitute, choose oven-safe materials that provide good heat distribution to ensure the bread bakes evenly.

Depth: 

The depth of the substitute pan is crucial in supporting the dough as it rises and bakes. Choose a substitute with a similar depth to maintain the desired texture and structure of the bread. The bread may spread too much if the pan is too shallow, resulting in a flatter loaf.

Greasing and Lining: 

Consider whether the substitute pan requires greasing or lining with parchment paper. Some alternatives may need greasing to prevent the bread from sticking, while others, like non-stick surfaces or disposable paper bags, may not require additional greasing. Follow the instructions specific to the substitute you choose to ensure easy removal of the baked bread.

Adaptation: 

Remember that using a substitute pan may slightly alter the appearance or shape of the bread. Embrace the uniqueness of each alternative and be open to creative adaptations. Experiment with different substitutes to discover new textures, flavors, and presentations.

By carefully considering these factors, you can confidently select the suitable substitute for your loaf pan and continue enjoying your baking adventures without limitations. Embrace the versatility of alternative options and let your culinary creativity shine as you create delicious homemade bread.

Tips for Using a Substitute Loaf Pan

When using a substitute loaf pan, it’s helpful to remember a few tips to ensure successful baking. Here are some valuable suggestions to make the most of your chosen alternative:

Grease or line the pan: 

Before adding the bread dough to your substitute loaf pan, grease it or line it with parchment paper. This step will prevent the bread from sticking to the pan, making it easier to remove once baked. Follow the specific instructions for greasing or lining based on the material of the substitute pan.

Adjust baking time and temperature: 

Depending on the substitute pan you choose, you may need to adjust the baking time and temperature slightly. Thicker or darker pans may require a longer baking time, while thinner or lighter pans may need less time. Keep a close eye on the bread as it bakes, and rely on visual cues and a toothpick test to determine when it’s done.

Monitor the loaf shape: 

Alternative plans may result in a slightly different shape for your bread loaf. Embrace uniqueness and be prepared for variations in appearance. If you’re using a substitute that deviates significantly from a traditional loaf shape, such as muffin tins or Bundt pans, consider adjusting the baking time accordingly to ensure the bread cooks evenly.

Use caution with delicate substitutes: 

Some unconventional substitutes, such as mason jars or clay pots, require extra care during baking. Please ensure they are oven-safe and handle them cautiously to avoid accidents. It’s always a good idea to place delicate substitutes on a sturdy baking sheet for added stability.

Test for doneness: 

Use the tried-and-true toothpick test to determine if your bread is fully baked. Insert a toothpick or skewer into the center of the loaf; if it comes out clean or with a few dry crumbs, the bread is done. If it comes out with wet dough or batter, continue baking for a few more minutes before testing again.

Allow for proper cooling: 

Once your bread is baked, please remove it from the substitute loaf pan and place it on a wire rack to cool completely. This allows for even airflow around the loaf, preventing moisture from accumulating and ensuring a crisp crust.

By following these tips, you can successfully navigate the use of substitute loaf pans and achieve excellent baking results. Embrace the versatility and creativity of exploring alternative options, and enjoy your homemade bread to the fullest.

Creative Ideas for Loaf Pan Alternatives

Creative Ideas for Loaf Pan Alternatives

If you’re looking to think outside the box and explore even more creative alternatives to a traditional loaf pan, consider these unique options:

Bread Machine

If you own a bread machine, take advantage of its versatility. Many bread machines have a specific setting for baking bread without using a separate loaf pan. Follow your bread machine’s instructions and let it work for you. This option is convenient and ensures consistent results.

Slow Cooker

Believe it or not, your trusty slow cooker can double as a loaf pan substitute. Grease the inside of the slow cooker and shape your bread dough to fit comfortably inside. Cover the slow cooker with its lid and cook on low heat for several hours until the bread is fully baked. This method produces a moist, tender loaf with a slightly different texture.

Dutch Oven

A Dutch oven, known for its excellent heat retention, can be an ideal substitute for a loaf pan. Preheat the Dutch oven in the oven before placing the bread dough inside. Cover it with the lid and bake as directed in your recipe. The Dutch oven creates a steamy environment, producing a crispy crust and a soft interior.

Instant Pot

If you own an Instant Pot or a similar electric pressure cooker, you can use it as a creative alternative to a loaf pan. Grease a heat-safe container or a springform pan that fits inside the Instant Pot. Place the container with the bread dough on a trivet inside the Instant Pot and cook in the appropriate setting. This method provides moist and evenly baked bread.

Grill

Yes, you read that right! You can even bake bread on a grill. Grease a cast iron skillet or a disposable aluminum pan and place it on a preheated grill. Cover the grill and bake the bread until it reaches the desired doneness. Grilling adds a unique smoky flavor to the bread, making it perfect for outdoor gatherings or adding a summery twist to your baking adventures.

With these creative alternatives, you can break free from the confines of a traditional loaf pan and explore new ways to bake bread. Each method offers its unique results, allowing you to infuse your homemade bread with exciting flavors and textures. Get ready to impress your family and friends with your ingenuity and delicious creations.

Frequently Asked Questions

Can I use a substitute pan for all types of bread recipes?

Yes, you can use a substitute pan for most bread recipes. However, remember that the bread’s shape and size may vary slightly, affecting the appearance and baking time. Adjusting the baking time accordingly and monitoring the bread closely for doneness is always a good idea.

Will using a substitute pan affect the texture of my baked goods? 

A substitute pan may produce a slightly different texture than a traditional loaf pan. Thinner or darker pans may result in faster or uneven baking, while thicker pans may require longer baking times. It’s essential to adapt the baking time and keep an eye on the bread as it bakes to achieve the desired texture.

What size pan can I substitute for a loaf pan? 

When substituting a loaf pan, look for a pan with similar dimensions to the original pan called for in your recipe. Aim for a similar length, width, and depth to ensure the bread bakes evenly. Adjust the baking time if the substitute pan is slightly larger or smaller.

What can I use if I don’t have a loaf pan? 

If you don’t have a loaf pan, there are several alternatives you can use, such as baking sheets or cookie sheets, casserole dishes, muffin tins, Bundt pans, or pie dishes. These options may result in slightly different shapes or textures, but they will still allow you to bake delicious bread.

What can I use instead of a loaf pan for meatloaf? 

You can use alternatives such as a casserole dish or a baking dish for meatloaf. These options provide enough space and depth for shaping and baking meatloaf. Grease or line the dish with parchment paper to prevent sticking and ensure easy removal once the meatloaf is cooked.

Conclusion

Finding the best substitute for a loaf pan opens up possibilities in your baking adventures. There are countless ways to achieve delicious bread creations, from using common alternatives like baking sheets or casserole dishes to exploring unconventional options like mason jars or clay pots. 

Consider the substitute pan’s size, material, and shape, and don’t be afraid to experiment and adapt recipes accordingly. Creativity and flexibility allow you to continue to bake and enjoy homemade bread without a traditional loaf pan. So go ahead, unleash your culinary imagination, and discover the joy of baking with innovative substitutes.